
Organizing a community event gets dramatically easier once you stop treating it like a vague creative project and start treating it like a series of decisions.
The fastest way to make progress is to answer five things early: why this event exists, who it’s for, what format fits, how many people you expect, and what success looks like. In my experience, most community events don’t fail because the idea was bad—they get messy because nobody made those calls soon enough.
How We Put This Community Event Planning Guide Together
This guide is built for real-world community events that usually fall between "casual neighborhood gathering" and "small public event": meetups, workshops, cleanups, school fundraisers, pop-up markets, local performances, and family-friendly community days.
We based the advice here on the planning checkpoints that consistently matter most: clear purpose, realistic attendance goals, budget control, simple promotion, volunteer coverage, check-in flow, and post-event review. That matches how current event-planning resources frame successful execution—start with purpose and measurable goals, then compare registrations to actual attendance, budget to actual spend, and feedback to your original objectives after the event, as outlined in this community event planning guide.
We also leaned on practical milestone-based planning rather than generic inspiration. A useful planning sequence is: set the budget, build the to-do list, create the timeline, track progress, execute, and evaluate—an approach echoed in this community event planning checklist.
A quick boundary: this article works best for events that can be run by a small team or volunteer group. If you’re planning a street closure, alcohol service, major amplified sound, traffic control, or thousands of attendees, expect more formal permitting, insurance requirements, vendor documentation, and staffing. For smaller gatherings, the process is lighter—but you still need the same core planning discipline.
Start with a Rock-Solid Event Blueprint
Before you book anything, build a one-page blueprint. This part is often skipped because it feels less exciting than picking a venue or posting a flyer. It’s also the part that prevents almost every expensive mistake later.

Start with the purpose. Are you trying to raise money, help neighbors meet each other, support local vendors, recruit volunteers, or test demand for a recurring event? A clear purpose tells you what kind of event to run. A neighborhood picnic and a ticketed maker market can both be successful, but they require different formats, budgets, and promotion.
Then define the specific community you want to bring together. Not "the public"—actual people. Parents with young kids? Apartment residents in one complex? Local artists? Seniors interested in low-impact activities? In practice, stronger community event planning usually comes from a clearly defined audience and measurable goals, not broad messaging. Current planning resources also recommend comparing registrations with actual check-ins and budget with actual spend so you can judge turnout against a real baseline, not a guess, as noted in this community event planning guide.
Next, choose the format that fits the goal. A cleanup, workshop, mixer, pop-up market, meetup, panel, or block-party-style gathering all create different demands for space, staffing, and communication. If the goal is connection, don’t overbuild the event. If the goal is fundraising or vendor sales, make sure the format supports transactions and foot traffic.
Then set an attendance goal. This should be specific enough to guide your decisions: 30 neighbors, 75 workshop attendees, 15 vendors, 200 visitors over three hours. Once you pick a number, you can choose a venue size, estimate supplies, assign volunteer roles, and decide whether registration matters.
Finally, decide what success looks like before the event happens. That could mean 100 RSVPs, 60 actual check-ins, $1,500 raised, 20 survey responses, 10 new volunteers recruited, or strong enough feedback to repeat the event next quarter. This sounds simple, but I’ve found it’s the biggest difference between organizers who feel good after an event and organizers who just feel tired.
Your One-Page Event Blueprint
Use this as the planning sheet that keeps the event from drifting. If you want a printable companion, this event planning checklist template from ABC Hire is a useful extra reference alongside your own notes.
| Question | Why It Matters | Example (Neighborhood Pop-Up Market) |
|---|---|---|
| What's the primary GOAL? | This filters every decision that follows. | Connect 20+ local artisans with nearby shoppers and generate $5,000+ in collective sales. |
| Who is this event FOR? | Specific audiences respond to specific messaging. | Young families and couples in the downtown area who prefer local, handmade goods. |
| What's the FORMAT? | Format determines venue, staffing, timing, and promotion. | Outdoor weekend market with vendors, kids' activity table, and acoustic music. |
| What's the attendance target? | You need a real number to size the event properly. | 150-200 visitors over four hours. |
| What's the budget ceiling? | Prevents enthusiasm from outrunning reality. | Maximum spend of $1,800 before sponsorships. |
| What type of venue fits best? | Keeps the space aligned with access, vibe, and logistics. | Small public plaza or church parking lot with restroom access. |
| Is it free or ticketed? | Changes promotion, check-in, and revenue planning. | Free for attendees; vendors pay a booth fee. |
| What's the desired VIBE? | Shapes the attendee experience and creative choices. | Relaxed, family-friendly, and festive. |
| What's the main TAKEAWAY? | Defines what people should remember afterward. | "I found great local makers and I’d come back next month." |
| How will you measure success? | Turns the event into something you can improve. | Vendor satisfaction, foot traffic, email signups, and post-event feedback. |
If you’re organizing a community gathering rather than a larger public event, the process is simpler but not different in principle. You can usually work with a smaller team, lighter promotion, and fewer vendors or formal systems. But you still need a goal, a rough headcount, a host or lead contact, and a basic plan for location, timing, accessibility, and communication.
| Question | Why It Matters | Example (Neighborhood Pop-Up Market) |
|---|---|---|
| What's the primary GOAL? | This is your filter for every decision you'll make. | To connect 20+ local artisans with community shoppers and generate $5,000+ in collective sales. |
| Who is this event FOR? | "Everyone" is not an audience. Specificity is key for marketing. | Young families and couples (ages 25-45) in the downtown area who value unique, handmade goods. |
| What's the desired VIBE? | This defines the atmosphere and attendee experience. | Relaxed, family-friendly, and festive. Think live acoustic music, not a loud DJ. |
| What's the main TAKEAWAY? | What's the one thing you want people to remember or feel afterward? | "I discovered so many amazing local artists here! I can't wait for the next one." |
Community Event Planning Checklist: From Idea to Follow-Up
Use this as a practical checklist, not a theoretical one.
6-8 weeks out
- Define the purpose and audience
- Choose the event format
- Set attendance and success goals
- Draft the budget ceiling
- Shortlist venue options
- Check whether permits, insurance, or venue approvals are required
- Decide whether the event is free, RSVP-based, or ticketed
4-6 weeks out
- Confirm venue and date
- Recruit core volunteers
- Assign lead roles for setup, check-in, vendor support, and cleanup
- Create your event page or registration flow
- Finalize the event schedule
- Start promotion through local channels
- Reach out to partners, schools, libraries, faith groups, or neighborhood organizations
2-3 weeks out
- Confirm vendors, speakers, or activity leads
- Order supplies, signage, badges, and printed materials
- Walk the venue or map the layout
- Review power, parking, restroom, seating, and accessibility needs
- Send reminder emails or posts
- Track registrations and compare them with your attendance goal
Event week
- Reconfirm all volunteers and partners
- Print check-in lists or test your check-in tool
- Prepare your contact sheet and run-of-show
- Pack backup supplies: tape, markers, chargers, extension cords, cash box, ponchos, first-aid basics
- Send final attendee reminder with time, location, parking, and what to bring
Event day
- Arrive early
- Set up signage first
- Brief volunteers before doors open
- Check entrances, accessibility routes, restrooms, and vendor needs
- Monitor attendance, timing, and any issues that need escalation
24-72 hours after
- Thank attendees, volunteers, partners, and vendors
- Review registrations versus actual check-ins
- Compare budget versus actual spend
- Gather feedback and note recurring comments
- Document what to repeat, cut, or fix next time
Tackle Your Budget and Logistics Like a Pro
Okay, let's talk about the two words that make most organizers break into a cold sweat: budget and logistics. People either get lost in a million-tab spreadsheet or just ignore the numbers until panic sets in.
We’re not going to do either of those things.
Nail Down Your Numbers
Your budget isn’t a monster; it's just a plan for your money. You don't need an accounting degree, just a clear head.
Start with the big-ticket items. These are the non-negotiables.
- Venue Rental: The cost for your physical space.
- Food & Drink: Are you hiring a trendy food truck or just grabbing snacks from a wholesaler?
- Equipment: Think tables, chairs, a decent sound system, maybe a projector.
- Marketing Materials: From printing flyers to running a few targeted social media ads.
Where most budgets go off the rails is in the details, the sneaky expenses that add up fast. I'm talking city permits, insurance, decorations, payment processing fees, and an "uh-oh" fund for when things go sideways.
My rule of thumb? Add a 10-15% contingency fund to your total cost. If you don't use it, great! But if you do, you'll be glad you planned ahead.
For a deeper dive, check out our guide on budgeting for an event.
Sort Out Your Logistics
Once you have a budget, the logistics become a puzzle you can solve. "Logistics" is just a fancy way of figuring out the "where" and "what."
First up, the venue. Go back to your blueprint—does the space fit the vibe? A gritty art gallery might be perfect for a pop-up market but a terrible choice for a kids' workshop. You also have to think practically. Is there enough parking? Is it accessible? A quick site visit answers questions a website never will.
Next, the paperwork. This is the boring but critical part. A quick call to your city hall will tell you if you need a special event permit, especially for a public space. Ignoring this can get your event shut down on the spot. It’s a five-minute call that can save you a world of hurt.
Build Your Team and Spread the Word
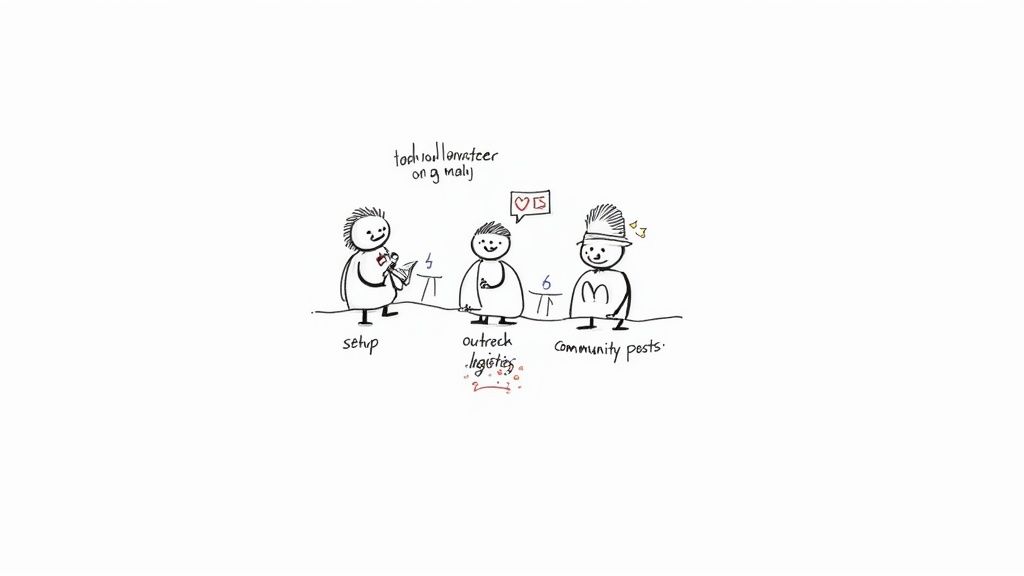
You do not need a giant committee to run a good event. You do need clear ownership. The most useful shift here is to stop thinking in terms of "helpers" and start thinking in terms of roles.
For a smaller neighborhood gathering, you may only need four core functions covered: someone to open and set up the space, someone to greet and check people in, someone to handle hosts/vendors/activity leaders, and someone to manage breakdown. For a larger public-facing event, those same functions still matter—you just need more than one person in each lane.
In my experience, vague volunteer asks create last-minute chaos. Clear role definitions make average volunteers look excellent because they know exactly what success looks like.
Define the Roles Before You Recruit
Start by assigning these jobs:
- Setup lead: Arrives first, checks tables/chairs/signage, manages supplies, and flags missing items.
- Check-in lead: Handles guest list, walk-ups, name tags, directions, and any payment or registration questions.
- Vendor or activity support: Helps speakers, booth holders, food vendors, or workshop leaders get what they need and solves small issues fast.
- Float/support runner: Covers breaks, restocks supplies, troubleshoots tech, and fills gaps.
- Cleanup lead: Makes sure trash, teardown, returns, and final venue checks happen.
If the event is free and informal, these can be shared by a tiny team. If it’s ticketed or spread across a bigger footprint, separate them out. I’ve seen events with great marketing still feel disorganized because nobody owned check-in or cleanup.
Who to Reach First
Recruit from people with a natural connection to the event before you go broad.
- Past attendees or people who already support the project
- Partners tied to the event’s theme or location
- Neighbor groups, school communities, faith communities, clubs, or local nonprofits
- Friends-of-friends who can cover a specific task rather than just "help somehow"
The closer the person is to the mission, the less explaining you have to do.
A Simple Promotion Plan That Actually Fits Local Events
Promotion works best when it starts with the warmest audience first, then expands outward.
- Start with your closest circle: existing email list, previous attendees, volunteers, neighbors, members, or customers.
- Then use trusted local channels: community Facebook groups, neighborhood newsletters, library boards, school parent groups, local businesses, and partner organizations.
- Then add reminders: a second wave closer to the event with the practical details people need to commit.
For smaller events, many planning guides now recommend starting outreach about 6 to 8 weeks ahead and using milestone-based reminders rather than a single announcement, which lines up with this step-by-step event planning timeline.
Messaging should change based on the event model:
- Free neighborhood gathering: lead with ease and belonging. Example: who it’s for, what to expect, whether kids are welcome, whether food is provided, and whether people can drop in casually.
- Ticketed event: lead with value and commitment. Example: what’s included, why space is limited, what makes the experience worth paying for, and the deadline or incentive to register early.
Sample Outreach Checklist
Use this list once, not endlessly. Good local promotion is consistent and targeted, not spammy.
- Post in relevant community Facebook groups
- Ask local businesses to display a flyer or share the event online
- Send details to the library or community center calendar
- Share through school newsletters or parent groups if the event fits families
- Reach out to faith groups with community bulletin channels
- Email your own list with a clear subject line and one action to take
- Ask partners to cross-promote with their audience
- Give volunteers a ready-made blurb they can copy and share
Low-Budget Promo Timeline: 4 Weeks to Event Day
4 weeks out: announce the event publicly, launch registration or RSVP, and send your first partner outreach messages.
3 weeks out: post one story or update focused on who should attend and why; ask partners and local businesses to reshare.
2 weeks out: highlight one reason to come—vendors, activities, speaker, workshop topic, free food, kid-friendly setup, or neighborhood impact.
1 week out: send reminder email, post practical details, and answer common questions about parking, timing, cost, and accessibility.
2 days out: share a concise reminder with time, location, and weather plan.
Event day: post a same-day reminder for walk-up traffic and a few photos or updates once things are underway.
The through-line is simple: make attendance feel easy, clear, and worthwhile.
Make Ticketing and Tech Work for You
Getting paid for your event shouldn't feel like wrestling a wild animal. The tech you use can either be your best friend or your biggest headache. Let's make it work for you.
First, pricing. Your ticket price needs to hit that sweet spot: high enough to cover your costs but not so high it scares people away. Look at your budget, make a realistic guess on attendance, and do the math to find your break-even point.
Ditch the Complicated Tools
You don't need a custom-coded website or a clunky enterprise system just to sell tickets. You’re a pop-up chef or a workshop host, not a multinational corporation. Your energy is best spent on the event itself, not fighting with software.
The right platform lets you set up a beautiful, custom-branded ticketing page in minutes. It should feel like an extension of your brand, not some generic third-party checkout. Your ticketing page is often the first real interaction someone has with your event. If it’s confusing, people will just close the tab.
You can gain a major advantage. To help you cut through the noise, we've put together a guide on the best way to sell tickets for your event.
Look for a service that can scale with you, whether you’re expecting 5 people or 5,000. Also, watch out for sneaky fees. Avoid any platform that skims a percentage of your sales. A simple, flat fee per ticket means you keep more of your hard-earned money. With the right setup, you get fast, secure payouts straight to your account.
We’re building Ticketsmith to solve this exact problem for people pouring their heart into events. It’s got no code and honest pricing. If that sounds like a breath of fresh air, join the waitlist at ticketsmith.co.
Master Your Event Day and Post-Event Follow Up
A good event day feels calm to attendees because the organizer handled the messy parts before doors opened. Don’t aim for perfection; aim for a clear operating plan.
Start with an arrival timeline. For most community events, the lead organizer or setup lead should be on-site first, then vendors or activity partners, then volunteers, then attendees. Give yourself more setup time than you think you need. In my experience, the first 30 minutes disappear into tiny fixes: moving tables, testing speakers, taping signs back up, figuring out where extension cords can safely run.
Event-Day Operating Plan
Work through setup in this order:
- Access and safety first: open spaces, confirm entrances, test lights or power, and make sure exits stay clear.
- Signage next: put up directional signs, check-in signs, restroom signs, parking notes, and any schedule boards before guests arrive.
- Core layout: place tables, chairs, vendor spots, activity areas, and any presentation space.
- Check-in station: set up guest list, QR codes if you use them, pens, badges, wristbands, cash box, and a simple script for walk-up questions.
- Experience details: decor, handouts, water station, kids’ area, photo spot, or merch table.
Before doors open, do a fast volunteer briefing. Cover who reports to whom, what the schedule is, where supplies are, how to handle common questions, and when to escalate an issue to the organizer. This takes ten minutes and prevents a lot of confusion.
Then run a quick accessibility check. Walk the route from entrance to check-in to seating or activity areas. Make sure signage is readable, pathways are clear, restrooms are identified, and anyone with mobility needs can participate without awkward workarounds. If your event is in a public venue, accessibility is not a bonus feature; it is part of basic operations, and the ADA guidance for event accessibility is a useful baseline.
You also need a backup plan for the predictable problems:
- Bad weather: indoor fallback, tents, postponement policy, or clear communication plan
- Volunteer no-shows: one backup person for check-in and one for setup/cleanup
- Vendor late arrival: temporary signage and a contact list so you can reroute quickly
- Lower attendance than expected: tighten the layout and bring energy to the room instead of leaving a sparse footprint
From Last Guest to Lasting Community
When the event ends, switch from hosting mode to review mode while details are still fresh.
Collect four things right away:
- Attendance numbers: registrations, walk-ins, and actual check-ins
- Feedback themes: what attendees, volunteers, vendors, or partners kept mentioning
- Money totals: revenue, refunds, sponsorships, and actual spend against budget
- Change notes: what to fix, cut, or repeat next time
That kind of review is now standard good practice in community event planning, especially comparing registrations versus actual attendance and budget versus actual spend, as noted in this post-event measurement overview.
Then do the human follow-up.
- Thank attendees with a short recap and one next step
- Thank volunteers and partners with specifics, not a generic blanket message
- Send a short survey with 3-5 questions max
- Save your notes in one place while the event is still fresh
If you also need a quick planning tool for the next round, Bizplanr can be a handy reference alongside your notes and recap docs.

This timeline shows how event tech can take the pressure off, streamlining the process from pricing all the way to payout.
It’s a great visual for how the right tools simplify your workflow, leaving you more time for what matters, the people.
The payoff is momentum. A community gathering becomes a recurring event when you can answer simple questions the next time around: What drew people in? Which partners helped? Did your free RSVP list convert into real attendance? Was the budget realistic? Organizers who documented these basics were far more likely to run a stronger second event than those who relied on memory.
Ready to Launch Your Next Event?
Feeling inspired? We get it. We're building Ticketsmith for creators just like you—the pop-up chefs, workshop leaders, and neighborhood planners who make things happen.
Truth be told, it’s the ticketing platform we always wanted but could never find. So we decided to build it ourselves.
You can get set up in minutes with a beautiful page that looks like your brand, not ours. And whether you’re planning for 5 people or 5,000, our tech is ready to roll.
We also believe in honest, flat-fee pricing. No sneaky percentage cuts skimming your revenue. Just fast, secure payouts straight to your account, so you can focus on the important stuff.
We’re putting the finishing touches on everything and have just opened the waitlist. Be the first to know when we go live.
Join the waitlist at ticketsmith.co and get ready for your smoothest event yet.
Common Questions We Hear
Look, even well-planned events come with practical questions. Here are the ones that matter most.
What are the 5 C’s of event planning?
A simple version is: concept, coordination, control, culmination, and closeout.
- Concept: what the event is for and who it serves
- Coordination: venue, vendors, volunteers, schedule, and communication
- Control: budget, risks, registration, and day-of decision-making
- Culmination: the actual event experience
- Closeout: follow-up, feedback, and review
If you’re planning a neighborhood cleanup, for example, the concept is community improvement, coordination is supplies and volunteer shifts, control is safety and turnout, culmination is the cleanup itself, and closeout is thanking people and planning the next one.
What are the 5 P’s of event planning?
Another easy framework is purpose, people, place, promotion, and post-event review.
That works well for local workshops, pop-up markets, and meetups because it keeps you focused on the basics instead of overcomplicating things. If one of those five is fuzzy, the event usually feels harder than it needs to.
How far in advance should I start planning?
For a smaller community gathering, start around 6 to 8 weeks out if you need a venue, volunteers, or active promotion. If it’s very simple—say, a recurring meetup in a familiar space—you may be able to move faster.
For anything with permits, multiple partners, vendors, or a larger public footprint, give yourself several months. The more approvals and moving parts involved, the less you want to improvise.
What counts as community organizing besides a formal event?
A lot. Community organizing can include neighborhood cleanups, petition drives, mutual-aid efforts, volunteer recruitment, listening sessions, advocacy meetings, pop-up information tables, workshops, and recurring meetups.
Not every community-building activity needs a stage, tickets, or a big public launch. Sometimes the best next step is a small gathering that helps people meet, share concerns, or join a local project.
How do I get people to actually show up?
Reach the warm audience first, then make attendance feel easy.
That means clear messaging, useful reminders, and practical details: where it is, when it starts, who it’s for, whether it’s free, what people should bring, and why it’s worth their time. For a neighborhood meetup, emphasize convenience and belonging. For a paid workshop or market, emphasize value and what people get.
Should a community event be free or ticketed?
If the main goal is access, participation, or neighborhood connection, free usually makes sense. If you need firmer attendance commitment, limited capacity, or revenue to cover meaningful costs, ticketing can help.
I usually like free registration or low-cost tickets when no-shows would create problems. It gives you better planning numbers without making the event feel unnecessarily formal.
At Ticketsmith, we're pouring our hearts into building the simple, no-fuss ticketing tool we always wished we had. With custom branding, flat-fee pricing that doesn't punish you for selling more tickets, and fast payouts, we've designed it for real people creating amazing experiences.
Be the first to know when we launch and sign up below.