You can get your event registration online, and it’s way easier than you think. This isn’t just for giant conferences with eye-watering budgets. This guide is for your weekend workshop, your pop-up dinner, or your local fundraiser. The kinds of events people pour their hearts into.
Why Spreadsheets Are a Terrible Way to Manage Events
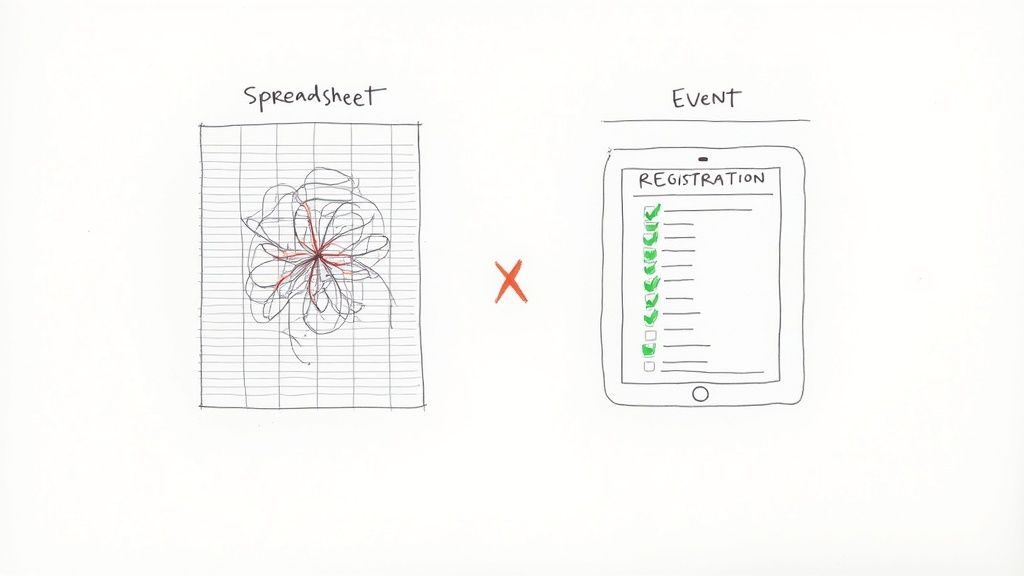
If you’re running sign-ups with a Google Sheet and a prayer, listen up. We've all been there. It starts simple. Then the chaos slowly creeps in.
Before you know it, you're manually highlighting who paid. You're copy-pasting email addresses into another list for updates. You're trying to decode a text thread to figure out who canceled and if their spot was filled. It’s a messy, time-sucking process.
This isn’t just about staying organized. Your registration is the first impression an attendee has of your event. A clunky, homemade system can make a fantastic event seem amateurish before it even starts.
The Real Cost of "Free" Tools
A spreadsheet feels free. But it costs you something way more valuable: your time and your sanity. Every hour spent wrestling with formulas is an hour you could’ve been promoting your event or dialing in the experience for your guests.
A dedicated tool for online event registration automates all that tedious stuff.
Payment Collection: Securely take payments and get the money sent straight to your account. No more chasing down Venmo requests.
Automated Communication: Confirmation emails and reminders go out automatically. Everyone gets the info they need without you lifting a finger.
One Place for Everything: All your attendee data lives in one place, updated in real time. You’ll never have to wonder which version of the spreadsheet is the right one again.
The whole point is to spend energy on creating an amazing event, not on administrative headaches. A simple, dedicated platform handles the boring parts so you can focus on the fun parts.
This shift toward better digital tools is happening everywhere. The virtual events market was valued at $94.04 billion in 2020 and is projected to hit $537.18 billion by 2029. This explosion shows just how critical a smooth online experience has become. You can learn more about this growth in these virtual events statistics.
Look Professional Without the Price Tag
You don't need a huge budget to look like you know what you're doing. Modern tools let you set up a branded registration page in minutes, complete with your logo and colors. It immediately looks like your event, not some generic form.
This builds trust right from the start. It tells attendees you're organized and that their information (and money) is safe. Plus, a flat-fee pricing model means you’re not getting skimmed with a percentage cut from every ticket you sell.
Ditching spreadsheets isn't about buying complicated software. It’s about choosing a simple tool built for creators like you. Whether you expect five people or 5,000, it’s time to give your event the professional front door it deserves.
How to Choose the Right Online Registration Tool

The market for online event registration is packed. Everyone promises you the world, but most of that stuff is built for giant corporations planning thousand-person conventions. You don't need a hundred features you'll never touch.
Let’s cut through the noise. This is a practical checklist for picking a tool that actually works for you, the small creator. It’s about finding a platform that supports your vision, not one that complicates it.
Focus on Simple, Honest Pricing
This is the big one. How you pay for your registration tool directly hits your bottom line. Many platforms hide their real costs behind confusing percentage-based fees that skim a cut off every ticket.
It might sound small. Maybe 3% plus a per-ticket fee. But that adds up fast, especially on higher-priced tickets. A $100 ticket could easily cost you $5 or more in platform fees before credit card processing.
A flat-fee model is almost always better. You pay a simple, predictable amount per ticket, like $1, no matter the price. This way, you keep more of the money you earn.
A platform's pricing tells you who they're built for. Percentage-based fees favor the platform. Flat fees favor you, the organizer. Choose the model that puts your revenue first.
To make this crystal clear, let's break down what you're actually paying.
Registration Platform Pricing Models Compared
This table cuts through the jargon to compare the common pricing structures you'll run into. It's a straightforward look at what you're really paying.
| Pricing Model | How It Works | Best For | Watch Out For |
|---|---|---|---|
| Flat-Fee Per Ticket | You pay a fixed amount per ticket sold (e.g., $1). | Organizers who want predictable costs and to keep most of their revenue, especially with varied ticket prices. | Making sure the flat fee is truly flat and there are no hidden monthly charges on top. |
| Percentage Per Ticket | The platform takes a percentage of each ticket's price (e.g., 2.5% - 5%). | Events with very low ticket prices, where the percentage is a tiny amount. | High ticket prices. A 5% fee on a $200 ticket is $10 straight to the platform. |
| Percentage + Fixed Fee | A combination of a percentage and a fixed amount (e.g., 2.5% + $0.99). | Almost no one. This model often results in the highest fees for the organizer. | This is the most expensive model. The fees stack up incredibly fast. |
| Monthly/Annual Subscription | You pay a recurring fee to use the software, regardless of ticket sales. | High-volume organizers running many events per year who can absorb the fixed cost. | Slow sales periods. You're paying for the service even if you don't sell a single ticket. |
The bottom line? Always do the math for your specific event. What looks cheap at first glance can often be the most expensive option once you sell a few dozen tickets.
Does It Look and Feel Like Your Event?
Your registration page is your event’s digital front door. Does it look like a generic, third-party portal, or does it look like your event? This isn't just vanity; it's about trust.
When attendees land on a page with your logo, your colors, and your voice, they feel more confident. It tells them they're in the right place and that their payment information is secure.
Look for a tool with dead-simple custom branding options. You should be able to upload your logo and pick your brand colors in just a few clicks. It’s a small detail that makes a huge difference.
Can You Set It Up in Ten Minutes?
You have an event to plan. You don’t have time to become a software developer or spend a week digging through technical manuals. Your registration tool should be intuitive and fast.
You should be able to go from sign-up to a live page in minutes. No code, no headaches. The whole process should feel obvious. Can you add a ticket type easily? Is it clear how to connect your bank account for payouts?
If the setup feels like a puzzle, walk away. There are simpler options out there built for people pouring their hearts into their work. The best tools are the ones you barely have to think about. They just work. For an all-in-one approach, exploring a website builder with a booking system can also be a smart move.
Finding the Right Fit for You
You're looking for a partner, not just a piece of software. You need a tool that understands the challenges of running a smaller, passion-driven event.
Here are the non-negotiables:
Flat-Fee Pricing: Keep more of your money. Avoid those sneaky percentage skims.
Custom Branding: Make the page look like your event, not theirs.
Fast Setup: Get your registration page live in minutes, no code required.
Secure Payouts: Money should go directly to your account quickly and safely.
Scalability: It should work just as well for your first 5 attendees as it does for 5,000.
Finding the right tool is a crucial first step. It should feel like it was made just for you.
Building a Registration Page That Sells Tickets

Think of your registration page as your event's digital front door. It’s where a curious visitor decides to become a paying attendee. That’s why it has to be clear, trustworthy, and incredibly easy to use.
Let’s be honest. No one wants to solve a puzzle just to give you their money. If the process is confusing, people will just leave. The goal is a smooth, confidence-inspiring experience.
We'll walk through the practical steps to build a page that does the heavy lifting for you.
Nail the First Impression with Clear Branding
The first thing people should see is your brand, not the ticketing platform's. When your registration page uses your logo and colors, it feels like a natural extension of your event's website. This isn’t just a nice touch. It’s a massive trust signal.
Put yourself in your attendee's shoes. A generic, unbranded page can feel a bit sketchy. A professionally branded page immediately tells them you’re the real deal and that their payment info is safe.
The good news is that modern tools make this easy. You don’t need a designer or a line of code. Just upload your logo, pick your brand colors, and the page instantly feels like yours.
Write an Event Description That Connects
Your event description isn’t a corporate memo. It’s a conversation. So, write like a human talking to another human. Be direct, be clear, and let your personality shine.
Forget the buzzwords. Nobody is "optimizing synergies" at your local pottery workshop. They’re getting their hands dirty and making a cool mug. Just say that.
People don’t read online; they skim. Keep it short and scannable.
Start with a strong hook: What's the core promise of your event? Lead with the most exciting part.
Use bullet points for details: List out what’s included, the schedule, or key takeaways. It’s easier to digest than a big block of text.
Answer the obvious questions: Clearly state the date, time, location (or virtual link), and anything attendees should bring.
Don’t try to sound clever. Just be helpful. A clear, honest description builds more trust than a paragraph full of marketing fluff ever could.
Offer Smart Ticket Tiers and Pricing
Not everyone wants the same experience. Offering a few different ticket types gives people options and boosts your revenue. It also makes your event registration online feel more organized.
You don't need a dozen confusing options. Two or three is usually perfect.
Early Bird: This creates urgency and rewards people for signing up early. It also helps with initial cash flow.
General Admission: The standard ticket. This should be your baseline price.
VIP or Premium: This tier offers something extra—a front-row seat, a special Q&A session, a swag bag, or a free drink. It’s an easy upsell for your most enthusiastic fans.
When you’re setting prices, work backward from your costs, but don’t forget to factor in the value you’re providing. Don't be afraid to charge what your event is worth.
Your registration form is not a census. Every extra question you ask is another reason for someone to abandon the process. Stick to the absolute essentials.
For most events, all you really need is a name and an email address. That's it. You can send tickets and updates with just that. If you're serving food, you might add a question about dietary restrictions. But resist the urge to ask for a phone number or job title unless it is absolutely critical.
This streamlined approach respects your attendees' time and dramatically increases completed checkouts.
Make Sure It Works on a Phone
Your beautiful registration page is useless if it falls apart on a mobile device. Data shows that while 78% of webinar sign-ups happen on a desktop, a crucial 22% come from mobile. Ignoring those users means losing almost a quarter of your potential audience.
Any decent platform handles this for you automatically. The page should look great and be easy to use on any screen size, with no extra work on your part. It's a non-negotiable feature these days.
Beyond just the design, be sure to explore proven strategies to increase event attendance by promoting your new, mobile-friendly registration page effectively.
Getting Paid Without the Headaches
Let's talk about the best part of selling tickets: the money. Getting paid can feel like a maze of confusing options, but it doesn't have to be. This is all about making sure the cash lands in your bank account, simple as that.
Remember, you're running a business—even if it's a pop-up dinner. Cash flow is king. The goal is a payment system that's fast, secure, and so easy you barely have to think about it.
Connecting Your Own Payment Processor
The old way was a nightmare. You’d wait for a ticketing platform to send you a check in the mail, sometimes weeks after your event. That's a terrible way to manage your money.
Thankfully, modern tools have moved on. Now, you can connect your own payment processor, like Stripe or PayPal, directly to your event.
This is a game-changer. When someone buys a ticket, the money (minus standard processing fees) goes straight into your Stripe or PayPal account. The registration platform you're using never even touches it. It's faster, more secure, and gives you complete control.
Setting this up usually takes minutes. You just log into your payment processor through your event tool, and you're done. No coding, no complex hoops. Just fast, direct payouts.
Understanding Fees So You Don't Get Fleeced
Fees are the number one headache for event organizers. Let's make it simple. There are only two types of fees to worry about.
Payment Processing Fees: These are unavoidable. Companies like Stripe or PayPal charge a standard fee (typically around 2.9% + $0.30) to handle credit card transactions. Think of it as the cost of doing business online.
Platform Fees: This is what your event registration tool charges. This is where you need to pay close attention.
Some platforms skim a percentage of every ticket you sell, on top of the payment processing fee. A better, more honest approach is a simple flat fee. You pay a fixed amount, like $1, for every ticket sold. That's it. It’s transparent, predictable, and almost always saves you a ton of money.
Don’t let a platform double-dip into your revenue. A flat fee protects your bottom line. As your ticket prices go up, your platform costs don't shoot up along with them.
For example, on a $150 workshop ticket, a 5% platform fee would cost you $7.50. A flat fee might cost you just $1. That difference adds up fast.
Managing Sales and Refunds Easily
A good system gives you a real-time dashboard of your sales. You should be able to see exactly how many tickets you’ve sold, which types are popular, and how much revenue you’ve generated at a glance. No more counting rows in a clunky spreadsheet.
And what about refunds? They happen. Someone gets sick, plans change. Your tool should make this totally painless. You need to be able to issue a full or partial refund with a single click from your dashboard. The money goes back to the attendee's card, and your sales records update automatically.
This turns a potential customer service nightmare into a simple, two-minute task. That level of control makes managing the financial side of your event much less stressful.
To dive deeper into the tools that can help with this, you might find some useful insights in our look at free event planning software.
What to Do After Someone Registers
That "New Registration" notification is a fantastic feeling. But your work isn't quite done. This is where you turn a simple sign-up into an excited, engaged attendee.
The moment someone clicks "confirm purchase" is the real beginning of their event experience. A clunky or silent process after they've paid can kill their excitement. A smooth, thoughtful follow-up builds anticipation and makes people feel cared for.
This isn't about spamming their inbox. It’s about giving them clear, helpful information that makes the whole journey seamless. Get this right, and people won't just show up. They'll come back for your next event, too.
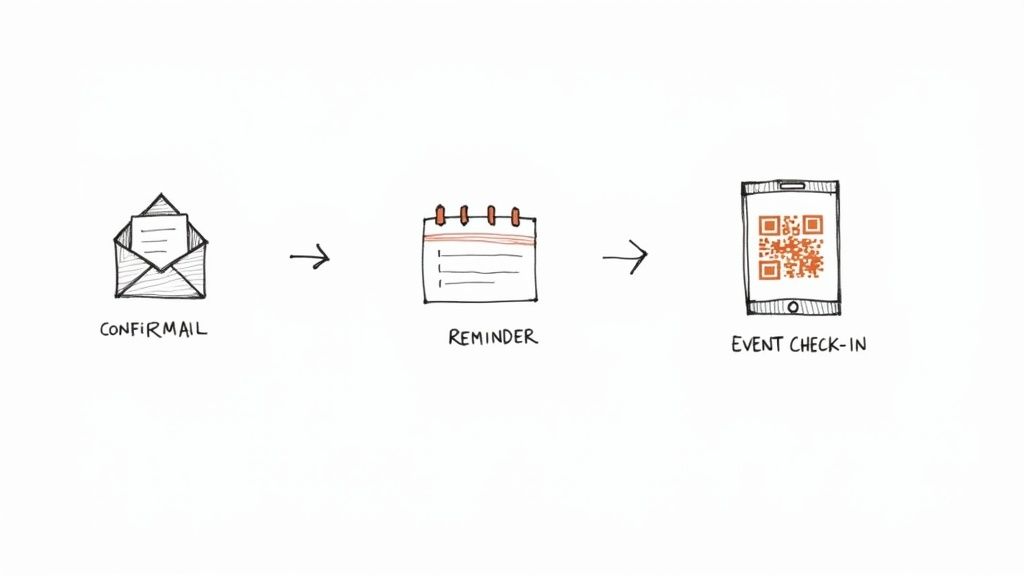
Craft a Confirmation Email That Actually Helps
Your confirmation email is your first chance to make a great post-purchase impression. It needs to do more than just say, "Thanks for the money." Think of it as a mini-guide that gives your new attendee everything they need.
Put yourself in their shoes. What would you want to know right after buying a ticket?
The Basics, Front and Center: Clearly state the event name, date, time, and location. For in-person events, include a map link. For virtual ones, provide a clear, can't-miss-it access link.
The Ticket Itself: Make sure a QR code or ticket number is included. This makes check-in a breeze and makes the whole thing feel official.
What Happens Next: Let them know what to expect. Will you send a reminder email a week before? Is there anything they should bring?
Add to Calendar Links: This tiny detail makes a huge difference. Let them add the event to their Google Calendar, iCal, or Outlook with a single click.
A solid confirmation email reassures attendees they made a great decision. It also prevents a dozen "Where do I park?" emails on the day of the event.
Keep the Conversation Going (Without Being Annoying)
Radio silence is a vibe killer. After that initial registration buzz, life happens. It's surprisingly easy for your event to slip off someone's radar. On average, only about 50% of registrants for a virtual event actually show up. That stat alone shows how critical it is to keep your event top-of-mind.
The key is to communicate with purpose. Forget generic "Don't forget!" emails.
Send reminders that actually add value. Share a sneak peek of a speaker's topic. Reveal the final menu for your pop-up dinner. Give them a reason to open the email and get excited all over again.
A simple, effective communication schedule could look like this:
One Week Out: A friendly reminder that includes a piece of value-added content.
One Day Before: The final check-in with all the critical logistics. Time, location, links, parking info, and anything else they absolutely need to know.
This gentle cadence keeps your event on their mind without ever feeling like spam.
Make Event Day Check-In a Breeze
The big day is here. The last thing you want is a long, chaotic line snaking out the door. Your check-in process should be just as smooth as your online event registration.
Thankfully, modern tools make this simple. No need to print out a massive list and get out your highlighter.
QR Code Scanning: This is the fastest method. Attendees show the QR code from their confirmation email on their phone. You scan it with your own phone using an app, and they’re in. It takes two seconds per person.
Digital Name Search: For the few who forgot their phone, you can just look them up by name on a digital list. A quick tap, and they're checked in.
This digital approach keeps your attendee list updated in real-time. It’s efficient, professional, and eliminates the stress of a paper-based system. Plus, all that clean check-in data is incredibly useful for your post-event wrap-up and analysis.
You've seen the roadmap for moving your event registration online. Still, a few questions always bubble up. Let's get right into them.
Getting this right from the jump saves you so many headaches down the line. It’s all about creating a smooth, professional experience for your attendees so you can focus on the event itself.
How Long Does It Take to Set Up an Event Page?
Honestly? You can go from zero to a live, professional-looking registration page in under fifteen minutes. I'm not kidding. The part that takes the longest is writing your event description and picking a good photo.
The actual technical part is lightning fast. Modern platforms are built for people who have an event to run, not for developers. You don’t need to know any code. If you can write an email, you can launch a ticket page. A great tool gets the tech out of your way.
What Is the Difference Between Percentage and Flat Fees?
This is a big one. It directly impacts your bottom line.
Percentage-based platforms take a cut of every single ticket sold. If their fee is 5% and you sell a $100 ticket, they pocket $5. That adds up shockingly fast.
Flat-fee platforms charge a fixed amount per ticket, say $1, no matter the price. That same $100 ticket costs you just $1 in platform fees. A $20 ticket also costs you $1.
For most small and local organizers, flat fees are a game-changer. It’s a predictable cost that lets you keep the vast majority of your revenue. It's just a more honest way of doing business.
A platform's pricing structure tells you who they really work for. Percentage fees serve the platform's bottom line. Flat fees protect yours.
Can I Use Online Registration for a Free Event?
Absolutely. In fact, it's one of the smartest things you can do. Just because tickets don't cost money doesn't mean you want total chaos.
Using a proper event registration online system gives you a reliable headcount, which is critical for planning everything from chair rentals to snack orders. It also gives you a direct line to communicate with everyone. Need to send a last-minute reminder? Boom, you have a clean email list. Plus, it just feels more official, turning a casual "maybe I'll show up" into a real commitment. Most good platforms have free or heavily discounted plans for free events.
What Attendee Information Should I Collect?
Less is more. I can't stress this enough. Start with the absolute bare minimum: name and email. Every single field you add is another tiny roadblock, another reason for someone to close the tab.
Only ask for what is mission-critical to run your event.
Hosting a workshop with a catered lunch? Asking for dietary restrictions is a must.
Teaching a screen-printing class? You're going to need their t-shirt size.
Selling tickets to your band's local gig? Name and email is all you need.
Respect your attendees' time with a short, clean form, and watch your ticket sales increase.
What if I Need to Cancel or Postpone My Event?
Life happens. Events get rained out, venues double-book, things change. A solid registration tool turns this potential catastrophe into a manageable task.
First, communicate. Your platform should let you email every registered attendee with a few clicks. This is your channel to clearly explain the situation and outline the next steps. Speaking of which, you should be able to process refunds, either individually or in bulk, directly from your event dashboard. It turns a logistical nightmare into a straightforward, professional response.