A Simple Template for Tickets for Events
Will Townsend
·
When you're buried in event planning, ticket design feels like another chore. But let's be real. The goal isn't a design masterpiece. It's to make something that just works. Something clear, professional, and functional.
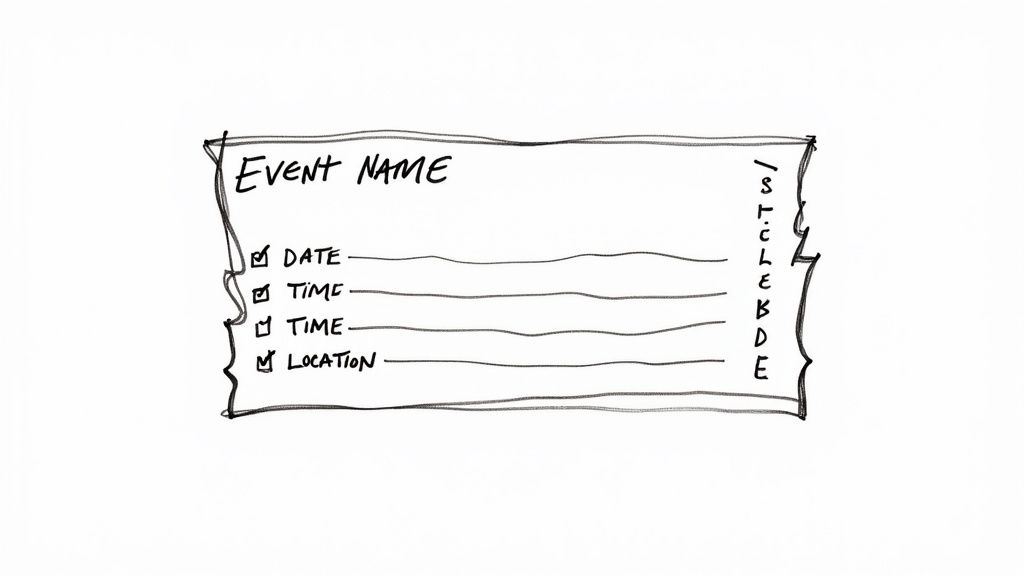
A good template for tickets for events nails four things: event name, date, time, and location. That's it. Getting these right prevents 99% of attendee confusion. It helps your event run smoothly from the start.
Your First Event Ticket That Works
I learned this the hard way. For my first pop-up dinner, I was so wrapped up in the menu that I forgot the address on the ticket. A tiny oversight? Nope. It led to 15 panicked phone calls an hour before service. It was stressful, unprofessional, and totally avoidable.
Don't be like me.
The Bare Minimum Checklist
Before you think about fancy fonts, focus on what your ticket must have. Its job is to get the right person to the right place at the right time. Everything else is secondary.
Here are the non-negotiables:
Event Title: Make it big, bold, and obvious. This isn't the place for clever taglines. Just clarity.
Date and Time: Be specific. Include the day of the week (e.g., Saturday, October 26). If doors open at a different time, state both clearly.
Full Address: Don't assume everyone knows "The Old Warehouse." Include the street address, city, and zip code.
Ticket Type: Is this a General Admission seat or a VIP pass? Specifying the type avoids awkward talks at the door. For more ideas, check out this full guide on different types of tickets on ticketsmith.co.
This foundation works for every event, from a five-person workshop to a hundred-person conference.
Ticket Essentials vs. Nice-to-Haves
It's easy to cram too much onto a ticket. Here's a quick way to prioritize.
| Information Element | Priority | Why It Matters |
|---|---|---|
| Event Name | Essential | The most basic identifier. No name, no event. |
| Date & Time | Essential | Prevents no-shows and late arrivals. |
| Full Location Address | Essential | Gets people through the door without frantic calls. |
| Ticket Type/Price | Essential | Confirms the purchase and entry level (e.g., VIP). |
| Your Brand Logo | High | Builds brand recognition and adds professionalism. |
| Contact/Support Info | High | Gives attendees a way to ask questions beforehand. |
| QR Code/Barcode | High | Critical for digital check-in and security. |
| Event-Specific Rules | Medium | Good for things like "No outside food" or "21+ only." |
| Sponsor Logos | Medium | Important for partners, but don't let them clutter the design. |
| Social Media Handles | Low | A nice touch for engagement, but not critical for entry. |
Stick to "Essential" and "High" priority. You'll have a ticket that does its job perfectly.
The best ticket template is the one you don’t have to think about. It just works.
Choosing the Right Ticket Format
Digital or print? This feels like another tiny decision that could blow up later. Let's make it simple. The right format causes the least stress for you and your attendees.
For my friends first workshop, she planned for 50 attendees. She spent $150 printing 500 beautiful tickets on glossy cardstock. The reality? Only 28 people signed up. And 90% of them asked if she could just email a copy so they wouldn't lose it. My friend learned an expensive lesson that she's not gonna repeat.
Print Tickets When Nostalgia Matters
Physical tickets still have a place. Remember the last time you went to a film festivals, an exclusive dinner, or anything with a vintage feel?
If you go this route, here are the only specs you need:
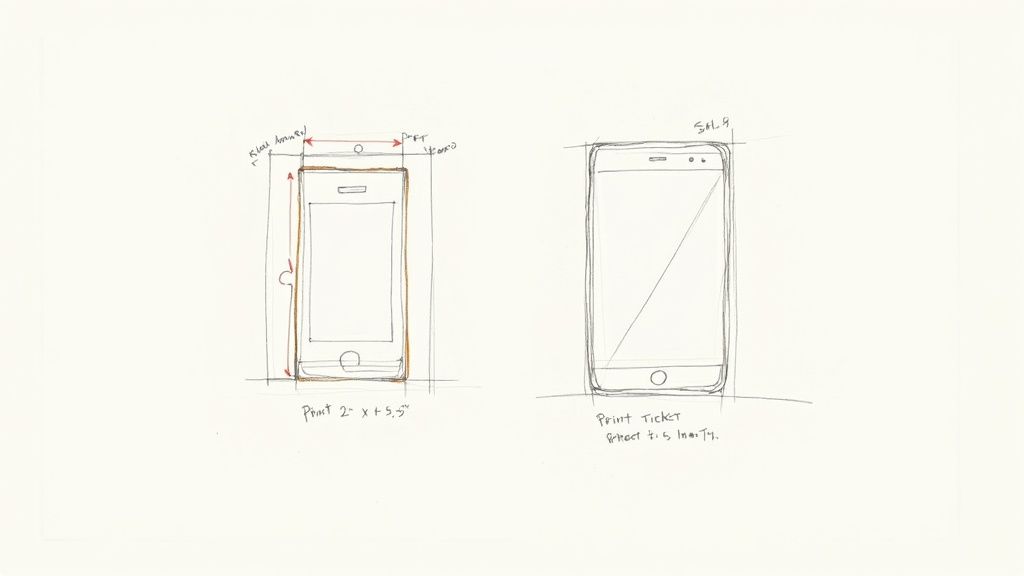
File Format: Always export as a high-resolution PDF. It locks in your fonts and layout.
Resolution: Set it to 300 DPI (dots per inch). Anything less will look blurry.
Color Mode: Use CMYK, not RGB. Printers use Cyan, Magenta, Yellow, and Black ink. A mismatch makes your colors look dull.
Digital Tickets for Almost Everything Else
For most modern events, digital is the default. It’s cheaper, faster, and what people expect. The online event ticketing market was valued at $72.84 billion and is projected to hit $107.1 billion by 2032. You can find more data on this shift at snsinsider.com.
A digital template for tickets for events needs to be readable on a tiny, cracked phone screen. This means big fonts, high contrast, and zero clutter.
Your ticket’s only job is to get someone through the door.
That’s why a platform that handles formatting automatically is a relief. When building Ticketsmith, I made our templates mobile-first and work perfectly for your customer's tiny cracked screens. If you’re tired of overthinking formats, digital is great.
Your Tickets Don't Need a Design Degree
You don't need to be a designer to make your tickets look like they belong to your event. I promise.
Forget wrestling with complex typography. The goal is simple, high-impact branding. You want your tickets to look intentional, not like a generic receipt.
Focus on two things: your logo and one or two brand colors. That’s it. A well-placed logo makes you look legit. A splash of color makes the ticket recognizable as yours. It's about looking professional without losing an afternoon to design software.
Readability Trumps Everything
A cool font no one can read is a bad font. End of story. Your ticket's job is to communicate information. If an attendee has to squint to see the start time, you’ve failed.
Stick to clean, simple fonts for the details.
Body Text: Go with a sans-serif font like Arial, Helvetica, or Open Sans. They were designed for readability.
Headlines: You can get a little more stylized with the event title, but it still has to be legible at a glance.
Contrast: Always put dark text on a light background or vice-versa. Low contrast is an accessibility nightmare.
Even the most creative templates put crucial info—date, time, location—in a straightforward, easy-to-read format.

I once used a script font for a workshop ticket because it looked "creative." Big mistake. I got three emails asking if the event started at 1 PM or 7 PM. Never again.
This is why a good platform handles the basics for you. With Ticketsmith, you just upload your logo and pick an accent color. The system applies it to a clean, readable template. It took me a while to get the logo placement right; my first version stretched it weirdly on mobile. But once it was set, I knew every ticket would be perfectly branded.
That simple setup saved me from answering those "what time is it?" emails.
Want to see how simple it can be? Join the waitlist at ticketsmith.co. We’re building ticketing for creators who have better things to do than agonize over fonts.
Why QR Codes Are Your Best Friend
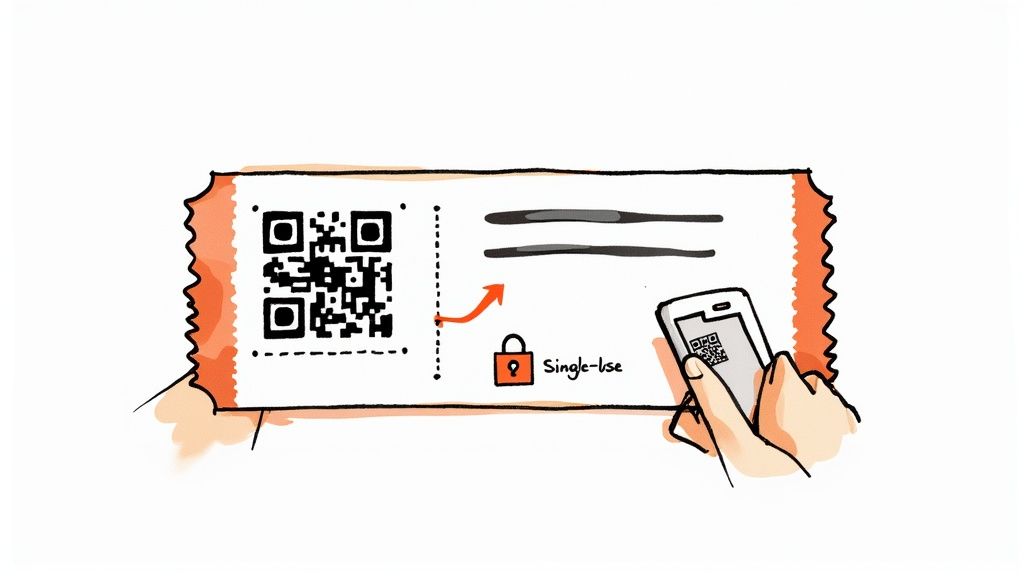
Let's get one thing straight. QR codes aren't just some techy gimmick. They are your single best tool for a chaos-free check-in. A scannable ticket makes you look organized and ensures every spot is paid for.
One Ticket, One Code
The point of a QR code is that it’s unique to each ticket. When you sell a ticket, the system generates a code tied to that purchase. When the attendee arrives, you scan it, the system says, "Yep, this one's good," and marks it as used.
If someone else tries to use a copy, the scanner will flag it: "Hold on, this has already been scanned." This prevents one person from buying a ticket and sharing screenshots with ten friends.
Your goal is a check-in process so fast people don’t notice it. A quick scan is professional. Fumbling with a printed list of names is not.
This isn't just for small gigs. The U.S. online event ticket market is a massive $12.5 billion industry. That growth attracts fraud, making unique QR codes essential. You can read more about industry challenges on ibisworld.com.
Free Generators vs. a Real System
You might be tempted to use a free online QR code generator. Please don't. Those tools create a single, static code. It’s useless for security.
What you need is a system that handles this automatically:
Free QR Generator: Creates one code. Every ticket will have the exact same code. Useless.
Ticketing Platform: Creates a new, unique QR code for every single ticket sold. It manages the database for you.
This is a core reason I started building Ticketsmith. Our platform automatically generates and emails a unique, scannable ticket. No spreadsheets, no manual code generation. Just a simple, secure template for tickets for events that works. If you're done with check-in chaos, sign up to Ticketsmith today and I'll let you know when we're ready.
How a Platform Puts It All Together
Let's be honest. Manually creating, sending, and tracking every ticket is a recipe for a migraine. You're juggling design files, spreadsheets, and a payment processor. It's a house of cards, one typo away from disaster.
This is where a good tool does the heavy lifting for you.
A modern ticketing platform automates the entire flow. You just set up a simple event page, upload your logo, and pick a brand color. The system handles the rest, turning your static template for tickets for events into a living system.
From Template to Action
Think of the platform as your tireless virtual assistant. It assembles all the essential ingredients perfectly for every purchase.
Generates Unique QR Codes: The system creates a fresh, scannable code for every attendee. Guaranteed.
Emails Tickets Instantly: The second someone buys a ticket, it’s delivered to their inbox. No more manual follow-ups.
Provides a Check-in App: On the big day, you just use a simple app to scan people in. The line moves quickly.
This whole approach frees you up to focus on creating an amazing experience, not on becoming an administrator. We've outlined the best way to sell tickets for an event in another guide on ticketsmith.co.
I once tried to manage a 50-person workshop using a Google Form for sign-ups, PayPal for payments, and manually emailing PDF tickets. It took an entire weekend. I messed up two email addresses and had to issue two refunds totaling $90. Never again.
That painful experience is why a service like Ticketsmith exists. It was built for real people pouring their hearts into their events. Setup takes minutes. Our flat-fee pricing means no sneaky percentage skims. It works just as smoothly for a five-person art class as it does for a 5,000-attendee festival.
Tired of the manual grind? Join the waitlist at ticketsmith.co. Let’s make ticketing the easiest part of your next event.
Real-World Ticket Template Examples
A one-size-fits-all template doesn’t work. The ticket for a coding workshop needs different info than one for a pop-up bakery. Getting the details wrong causes headaches.
I once ran a pie-making class and forgot to put "BYO apron" on the ticket. My friend showed up in a new sweater. I ended up with a $60 dry cleaning bill and a valuable lesson. The right template is 90% of the way to a perfect ticket.
The Workshop or Class Ticket
For any educational event, clarity is king. Your attendees need to know what to expect and what to bring.
Your template must include:
Prerequisites: Be upfront. Something like, "Must have basic Python knowledge" prevents frustration later.
Materials to Bring: Get specific. "Laptop and charger" or "Notebook and pen." This is where my "BYO apron" reminder should have gone.
A Clear Agenda: A simple schedule like "10 AM: Intro, 11 AM: Hands-on lab" helps set expectations.
The Food Event Ticket
For a pop-up dinner or food festival, the ticket is part of the experience. It also needs to handle critical dietary information.
Here are a few essential additions:
Key Menu Items: A teaser like "Five-course tasting menu featuring local seafood" builds anticipation.
Allergen Warning: This is non-negotiable. A simple line like, "Please notify us of any food allergies 48 hours in advance" protects you and your guests.
Seating Information: Is it communal seating or reserved tables? A quick note clarifies the vibe.
The Small Music Gig Ticket
For a local band, the biggest source of confusion is timing. People want to know when to show up. Our guide on printing tickets for your gig digs into this, but the core idea is to be painfully explicit.
Your ticket must clearly state:
Doors Open: The time people can get in and grab a drink.
Show Starts: The time the first act hits the stage.
Age Restrictions: A big, bold "21+ Only" saves everyone from an awkward conversation at the door.
Even as events get more specialized, the ticketing market is booming. Sports alone is expected to more than double from $20.5 billion to $45.6 billion by 2033. You can find more data on this trend over at custommarketinsights.com.
Common Questions About Event Tickets
Let's cut to the chase. Here are direct, no-fluff answers to nagging questions about tickets.
What's the Best File Format for a Printable Ticket?
A high-resolution PDF. Period.
It’s the standard for a reason. A PDF preserves your fonts and layout. What you see on screen is what comes out of the printer. Don't send a JPG or PNG for printing. They can often end up blurry.
Do I Really Need a Unique QR Code for Every Single Ticket?
Yes, absolutely. This isn't a nice-to-have; it's essential if you're charging money.
If you use the same QR code on every ticket, what’s stopping someone from buying one ticket and sending it to ten friends? Nothing. A unique code can only be checked in once. It’s the single most important security feature for a paid event.
How Much Information Is Too Much for a Ticket?
If the information isn't essential for getting your attendee in the door, leave it out. Your ticket is not a brochure.
Stick to the basics:
Event name
Ticket type (e.g., VIP, General Admission)
Date and time
Venue address
Everything else belongs on your website or in a follow-up email. Keep it clean.
Your ticket's job is to be a key, not the whole instruction manual.
Trying to stitch together a design tool, a payment processor, and a spreadsheet is a huge waste of time. A dedicated platform is the simpler path.
Join the waitlist
Be the first to know when Ticketsmith launches. Get exclusive access and early-bird pricing.
Written by
Will Townsend
Founder, Ticketsmith
Writes practical guides on event ticketing, pricing, and promotion for independent organizers.