How to Create Tickets for an Event Without Losing Your Mind
Will Townsend
·
Before you touch a “publish” button, let’s talk strategy. Nailing down your event tickets isn’t about the tech you use but it’s about making a few smart decisions before you start building your event.
A few minutes of planning right now can save you hours of headaches later. You can get started by answering three simple questions.
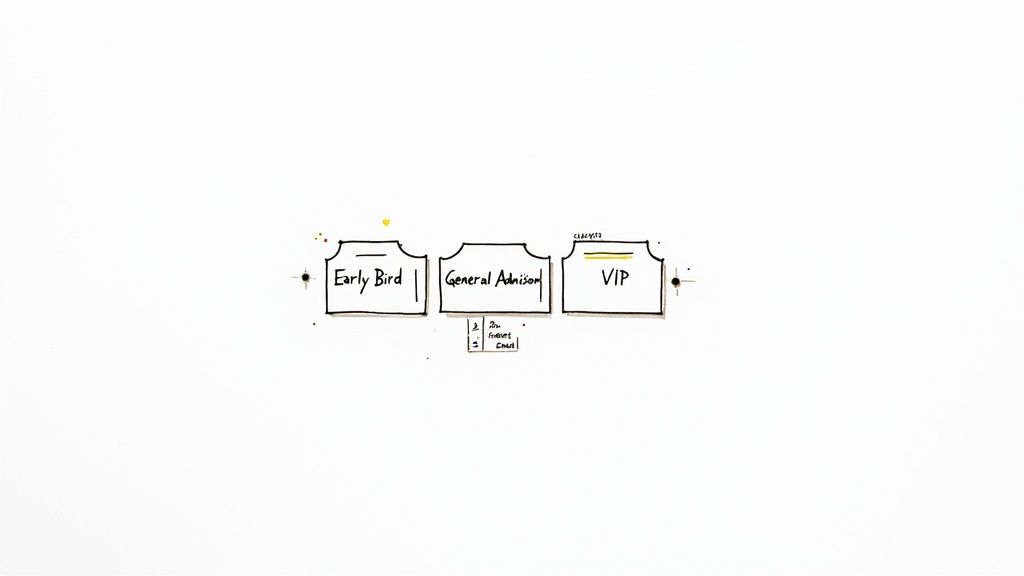
Map Out Your Ticket Tiers
First up: what are you actually selling? Even a simple workshop can benefit from a few different ticket options. This doesn't have to be complicated.
Offering tiers is a great way to structure sales and build momentum. Early bird tickets often sell 20–40% of an event's total capacity right out of the gate.
Not sure where to start? Here are the most common options I've seen work for everyone from pop-up chefs to local bands.
Common Ticket Types and When to Use Them
| Ticket Type | What It's For | A Smart Tip |
|---|---|---|
| Early Bird | Rewards your biggest fans and creates initial buzz. It's a fantastic way to get cash flow going early. | Limit the quantity or set a strict end date. "First 50 tickets" creates real urgency. |
| General Admission | The standard ticket. This will probably be the bulk of your sales. | Keep the description clear. Don't overcomplicate your main offering. |
| VIP / Premium | Offers something extra. Think front-row seats, a free drink, a Q&A, or early access. | Make the perks genuinely valuable and spell them out. People need to see what they're paying more for. |
| Group / Bundle | Encourages people to bring friends with a slight discount (e.g., four for the price of three). | Perfect for social events. It turns one ticket buyer into a walking advertisement for you. |
These are just ideas. For a deeper dive, we wrote a full guide on the different https://ticketsmith.co/blog/types-of-tickets.
Set a Fair Price
Next is pricing. Your price needs to cover your costs, feel fair to attendees, and hopefully leave you with a profit.
The biggest trap isn't pricing too high or low. It's forgetting about the fees. Some platforms skim a percentage from every single ticket. A surprise 5% cut can really sting. My advice? Find a service with simple, flat-fee pricing. You'll know exactly what you’ll take home. No surprises.
Don't overthink this. Calculate your hard costs (venue, staff, supplies). Add a buffer for your time. Set a price that feels right. You can always change it for the next event.
Decide What Information to Collect
Finally, what do you really need to know about your attendees? The urge is to ask for everything. Phone number, address, t-shirt size. Fight that urge.
For most events, all you truly need is a name and an email address. That’s it.
Anything more just adds friction. Each extra field is another chance for someone to get distracted and abandon their cart. You just need enough info to send them a ticket and check them in. To make that even smoother, you can add event-specific QR codes to your tickets.
Building Your Event Page in Minutes
Okay, prep work is done. Now for the fun part, when your event starts to feel real. Building the actual page shouldn't be a technical nightmare. It should take minutes, not days.
Think of this page as your event’s first impression. Its only job is to give people the essential details so clearly they have no questions left. Just "Where do I sign up?"
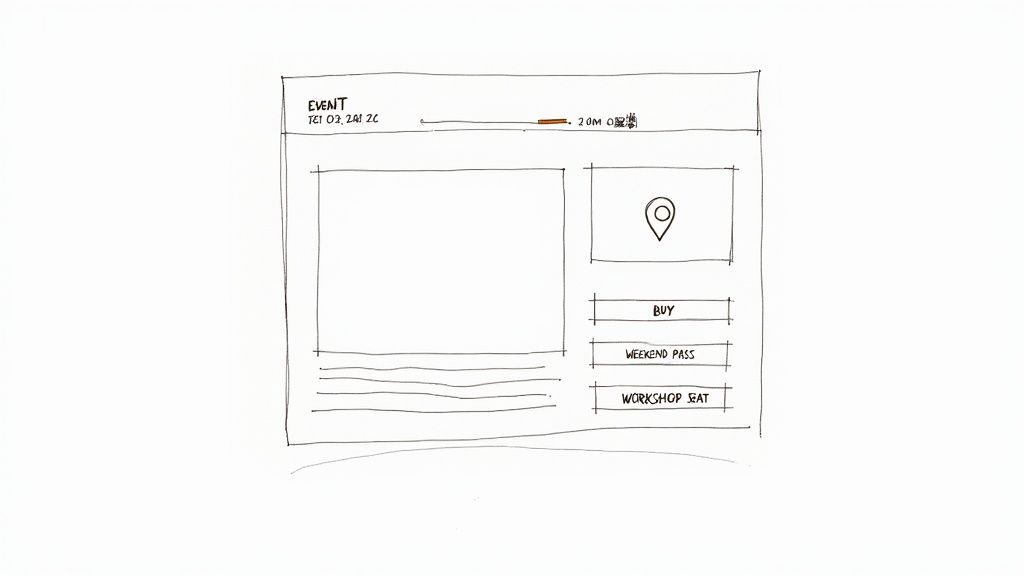
This simple wireframe nails the basics. Date, time, location, and a crisp description are the absolute essentials.
Nail the Essential Details
Put yourself in your attendee's shoes. What do they need to know right now to make a decision? Don't make them hunt for it.
Here’s the bare minimum your page needs, front and center:
Event Title: Be clear. "Sourdough Basics Workshop" is perfect. "Artisanal Culinary Experience" is vague and sounds expensive.
Date & Time: List the start and end times. If it's an online event for a global audience, always specify the time zone.
Location: For a physical event, give the full address that links to a map. For a virtual one, be clear about how and when they’ll get the access link.
A Killer Description: One or two short paragraphs. Explain what the event is, who it's for, and what they’ll get out of it. Use a confident, friendly tone.
This isn’t the place for a novel. It’s a quick pitch to get a "yes."
Setting Up Your Tickets
With the details locked in, it’s time to add the tickets. This is where modern ticketing tools are great. It’s just filling in a few fields. No code, no complicated setup.
Give each ticket a name, like 'Weekend Pass,' based on the tiers you mapped out earlier. Then, plug in the price and the quantity. Capping the number of tickets is a great way to create a little urgency and, you know, manage your headcount.
Pro tip: schedule your ticket sales. Set your Early Bird tickets to go on sale first. Then have them switch off right when General Admission becomes available. It creates a natural buzz without you having to manually flip a switch at midnight.
Most tools today are built for real people, not developers. You can find some good comparisons of the best ticketing platforms for events that focus on simplicity. The goal is to get your page live and selling so you can get back to planning a great event.
Making Your Ticket Page Look Like You
Your event has a personality. Why should your ticket page look like it came from a corporate filing cabinet?
A generic checkout page screams "middleman" and can make people hesitate. They're about to trust you with their money. The page should feel like it belongs to you.
Don't worry, this isn't about hiring a designer. It's about a few simple tweaks that make a huge difference. You can have custom branding set up in minutes to build trust and get people to hit 'buy'.
Add Your Own Branding
The goal is simple: make the buying experience feel like part of your event, not some giant ticketing corporation's site. When someone decides to buy, they're buying into your vision. Your branding should reflect that.
In my experience, three small things have the biggest impact:
Your Logo: This is a no-brainer. Upload a clear logo. It immediately tells people they’re in the right place.
A Header Image: Pick a photo that captures the feel of your event. A cozy workshop? Use a warm shot. A high-energy concert? Use a dynamic photo. Sell the feeling.
A Brand Color: Choose one primary color that matches your event's style. Apply it to buttons and links. It's a subtle touch that ties the page together.
These aren't just decorations. They're powerful signals of professionalism that make attendees feel more confident paying you. It’s an easy way to create tickets for an event that feel custom and legit.
Carry the Look Through to the Ticket
The branding shouldn't stop at checkout. The digital ticket in their inbox needs that same visual identity. A good platform will automatically pull your logo and colors onto the final ticket for you.
This creates a seamless journey for your attendee. They see your branding on the event page, at checkout, and on the ticket itself. It feels professional and entirely yours.
A well-branded ticket page does more than sell tickets. It reinforces your event's identity. It makes the whole operation feel legit.
If you want inspiration, we gathered ideas for a simple but effective template for tickets for events. The best part? It's all about simple choices, not complicated design.
Getting Paid Without the Drama
Okay, let's talk about the most important part: the money. This is where your hard work pays off. It needs to be simple, fast, and secure.
Connecting a payment processor like Stripe should be as easy as logging in. Modern tools handle this with a few clicks. No coding needed.
The money should flow directly from your attendees to your account. Fast, secure payouts are a game-changer for independent creators who need cash flow for the venue or supplies. No more waiting for a platform to release your money on their schedule.
Understanding the Fees
This is where so many organizers get tripped up. Murky ticketing fees can turn a profitable event into a frustrating one. You have to know how much you're giving away.
You'll generally see two models:
Percentage-Based Fees: The platform skims a percentage (like 2.9% + $0.30) from every ticket. On a $50 ticket, it might not seem like much. For an event with 500 attendees, it adds up to a huge chunk of your revenue.
Flat Fees: This is the straightforward approach. The platform charges a simple, flat fee per ticket (say, $1). You know exactly what it costs, whether you're selling a $10 workshop seat or a $200 VIP pass.
With flat-fee pricing, you keep more of your money. It’s that simple. You did the work. You should get the reward.
Why a Smooth Checkout Matters
A clunky, slow payment process is the fastest way to lose a sale. The online ticketing market is huge, expected to top $62 billion in 2024. With most sales happening on mobile, a seamless checkout is non-negotiable.
Reducing friction is critical. You can explore ticketing statistics to see how much a smooth mobile experience impacts revenue.
To protect your money and your customers, you need robust fraud detection measures. Good platforms have this built-in, so you don't have to worry. It's all about creating a secure, trustworthy checkout.
Getting paid should be the easiest part. Choose a system that gives you direct payouts, transparent fees, and a secure checkout. That financial control lets you run your event on your terms.
The Pre-Launch Final Check
Almost there. Before you smash that publish button, run a quick test. This is the simple step everyone skips and almost always regrets.
Don’t be that person.
Give yourself five minutes to walk through the entire purchase process, just like an attendee would. Finding a typo now saves you from a dozen confused emails later. It's the best return on investment you'll get all day.
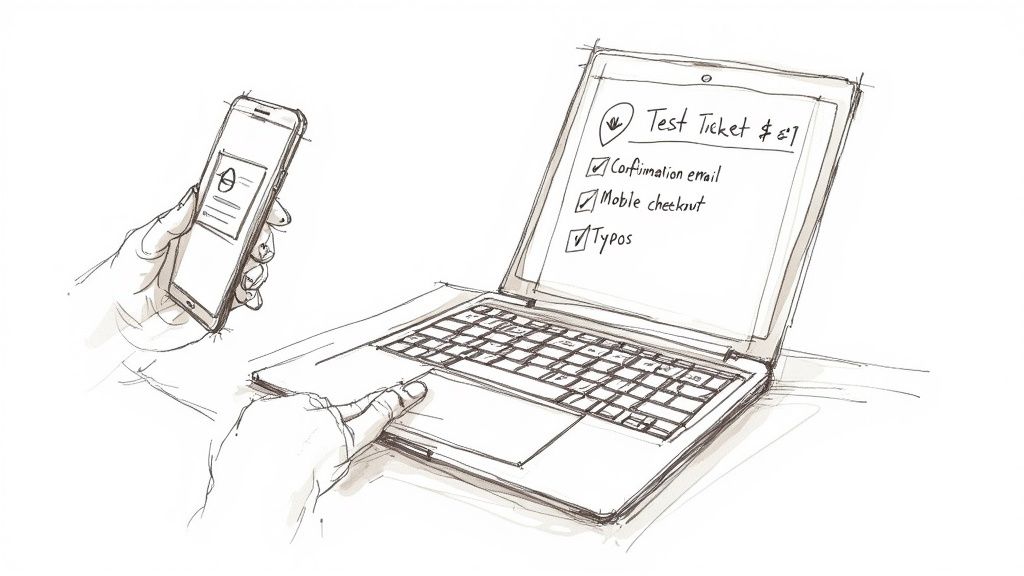
Run a Test Purchase
The trick is to create a hidden, free, or $1 test ticket only you can see. This isn't about the money. It's about seeing exactly what your customers will see. Go through the entire flow, from adding the ticket to your cart to checkout.
Treat this like a real purchase. Use your own credit card if you have to. Experiencing the process firsthand is the only way to spot the small snags that create big frustrations.
Once you’ve bought the ticket, check everything.
The Confirmation Email: Did it arrive quickly? Does it look right? Are the event details correct?
The Digital Ticket: Is your branding there? Can you clearly see the event name, date, and location?
The Mobile Experience: Try it on your phone. Is the checkout smooth, or are the buttons tiny and impossible to tap?
The Links: Click every single link on the page and in the email. Do they go where they're supposed to?
This final check ensures your tickets actually work. It’s also a good time to double-check their security. Modern ticketing relies on unique identifiers like QR codes to prevent fraud. With some platforms processing over 600 million tickets, this automated security is pretty standard. Check out these event ticket sales statistics to see how big the stakes are.
Publishing and Sharing Your Link
Once you’re confident that everything works, go live. Hitting 'publish' should feel like a relief, not a gamble.
With your page public, your next job is to share that link everywhere your audience lives. Don't just post it once.
Add the link to your social media bios.
Send it in your newsletter.
Pin it to the top of your Facebook group.
This isn't spammy. It’s making it incredibly easy for people to find your page and give you their money. You’ve built the launchpad. Now send it.
Managing Sales and Welcoming Guests
The tickets are selling. Now what?
This is where the fun begins. You watch the magic happen and prep for the big day.
Mostly, this just means keeping an eye on your dashboard. Good software gives you a simple, live view of who's coming and what you've earned. Honestly, watching those numbers climb is one of the best feelings. It’s how you know your five-person workshop is sold out or if your 5,000-attendee festival is on track.
Making a Great First Impression
Okay, let's talk event-day logistics. The check-in has to be fast. Nothing kills excitement faster than a long, slow line. It’s a terrible first impression.
Your goal is to make welcoming guests feel effortless, even if you’re a one-person show. Thankfully, you have a couple of solid options:
Scan QR codes with a mobile app. This is by far the fastest method. An attendee pulls up the ticket on their phone, you zap it, and they’re in. Done.
Use a digital check-in list. Pull up your attendee list on a laptop or tablet and check off names. It’s low-tech but works perfectly for smaller gatherings.
The pros aim for a sub-two-second scan for each ticket. With the secondary ticket market blowing up, this speed also depends on having unique, non-counterfeit tickets for every guest. If you're curious how gate operations scale, you can explore some fascinating event industry statistics.
Your welcome sets the tone for the entire event. A smooth, friendly check-in tells your guests that you're organized, you respect their time, and they're in for a great experience.
Don't sweat last-minute hiccups. They always happen. Someone will lose their email or need to transfer a ticket at the door. A good system lets you look up their name and resend their ticket in seconds. It makes you look like a hero.
Got Questions? We've Got Answers
You've got the big picture, but a few small questions can slow you down. Let's tackle the common ones we hear from creators putting on their first event.
How Far in Advance Should I Sell Tickets?
It depends, but there's a good rule of thumb. For smaller events like workshops or local pop-ups, aim for four to six weeks out. For bigger productions like a multi-day festival, you might start promoting six months ahead.
The sweet spot is giving yourself enough runway for promotion without people buying a ticket and completely forgetting about it. A great way to kickstart sales and gauge interest is to launch with an early-bird discount.
What Should My Refund Policy Be?
Figure this out before you sell a single ticket and state it clearly on your event page. Trust me, a wishy-washy policy is a recipe for an inbox full of angry emails.
A few common approaches:
No refunds. Simple and direct, but it can deter some buyers.
Refunds up to seven days before the event. This is a fair middle ground that protects you from last-minute cancellations.
Tickets are transferable. This is often the easiest path. It lets people give or sell their spot to a friend, which solves their problem without creating one for you.
Whatever you decide, a good ticketing platform should make processing a refund a one-click job.
Can I Sell Tickets at the Door?
You can, but it’s almost always better to drive online sales beforehand. Selling online gives you a solid headcount for planning (how many chairs? how much beer?) and locks in your revenue ahead of time.
If you do sell at the door, ditch the cash box. Use a mobile ticketing app to take card payments on the spot. It keeps all your sales data in one place and looks way more professional.
Do I Really Need Different Ticket Types?
Honestly? Not always. If you're hosting a simple workshop with one price, a single "General Admission" ticket is perfect. Don't overcomplicate it.
Ticket tiers like "Early Bird" or "VIP" are just tools. You use them to create urgency or offer different levels of experience. If that doesn't fit your event, stick to the basics.
Join the waitlist
Be the first to know when Ticketsmith launches. Get exclusive access and early-bird pricing.
Written by
Will Townsend
Founder, Ticketsmith
Writes practical guides on event ticketing, pricing, and promotion for independent organizers.