A Practical Timeline for Events That Don't Fall Apart
Will Townsend
·
An event timeline is your roadmap from a good idea to a packed house. It's how you get from that first spark to the moment the doors open. Forget complicated charts for now. You start months before by setting big goals and working backward to create milestones for booking a venue, launching marketing, and selling tickets.
Your Timeline Starts the Moment You Get the Idea
The real timeline for any event—a pop-up dinner, a coding workshop, a community market—begins with "what if?" This is where you turn a concept into something real.
The first step isn’t opening a spreadsheet. It’s mapping out the big pieces by working backward from your event date.
Think of it as your anchor. It starts here:
- Define Your Goal: Are you building a community, teaching a skill, or creating an amazing one-night experience? Nailing down your "why" is the most important first step.
- Set a Real Budget: Get a handle on your major costs (venue, supplies, marketing). Figure out how many tickets you need to sell to break even. This financial clarity is crucial.
- Pick a Date: Choose a date that gives you enough planning time. Make sure it doesn't clash with major holidays or similar local events.
Building the Foundation
Once those basics are locked in, you can start blocking out the first big chunks of work. The key is securing the non-negotiables before you get lost in the details. This is how you build momentum.
Your first moves should be finding a venue, identifying key partners, and sketching out your marketing message. We break these first steps down in our guide to starting an events business.
This is also the perfect time to think about your ticketing. Getting this right makes a huge difference. You don’t need a perfect plan from day one. You just need a clear direction.
A solid plan up front prevents so much chaos later. It’s all about building momentum, not getting bogged down in tiny details before you even have a venue.
A simple, no-code ticketing page can be set up in minutes. You can start generating interest (and revenue) almost immediately. Plus, you can add your custom branding so it looks like your event, not some generic platform.
The Pre-Event Countdown: Your Planning Checklist
Okay, let's get into the details. This is where your vision turns into a to-do list. We’ll break the pre-event timeline into manageable chunks. This makes it feel less like a mad dash and more like a controlled countdown.
Every great event starts as a spark, becomes a strategy, and then gets a solid foundation.
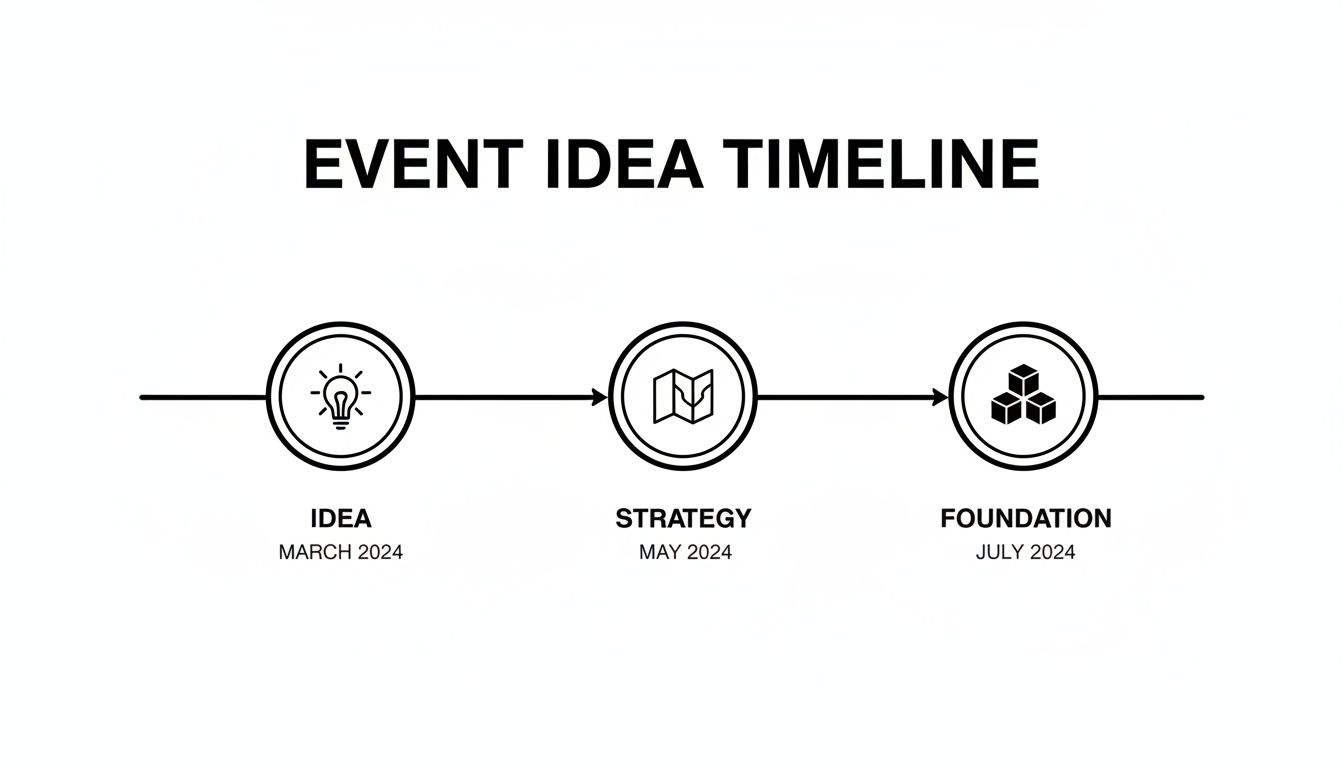
Each stage builds on the one before it. This sets you up for success long before the doors open.
Three Months Out: The Launchpad
With about twelve weeks to go, your focus is giving your event an identity. And more importantly, opening the doors for ticket sales. This is your launchpad.
Here are your priorities:
- Lock in your branding. Finalize the event name, get a logo, and establish the overall look. Consistency is your friend.
- Get your ticketing page live. Don't wait for perfection. A simple, clean page can be up in minutes. Add your own custom branding so it feels like your event from the first click. This is the best way to capture initial interest.
- Start making noise. Tell people what you're doing. Post on social media, send a teaser email, and let your community know something exciting is coming.
The goal isn't to sell out overnight. It's to plant a flag and give people a reason to get excited.
Six to Eight Weeks Out: Building Momentum
At the six-week mark, you shift from high-level planning to hands-on work. This is when the moving parts start clicking into place. Your main job is to keep the marketing drum beating with a steady rhythm of reminders and updates.
This is also crunch time for logistics. Get written confirmation from all your vendors, from the food truck to the AV tech. Place orders for physical items like name tags or signs. Trust me, giving yourself a six-week cushion is a gift to your future, less-stressed self.
Your timeline should include ticketing milestones. An early-bird discount right after you launch can create a nice burst of sales. With a flat-fee ticketing tool, you just set the price and you’re good to go. No hidden percentage skims.
The Final Two Weeks: Execution Mode
Welcome to the final stretch. These last two weeks are about locking down details and making sure everyone is on the same page. You should be sending reminder emails to ticket holders with key info like directions and parking tips.
This is your window for a final venue walkthrough. Confirm every last detail of your staff schedule. For a super-detailed breakdown, our comprehensive event planner checklist sample is a lifesaver.
And don't miss this in the final rush: make sure your plan includes planning security for event hire. It's a critical detail for a safe experience. Finally, set a hard cut-off for online ticket sales (we suggest 24 hours before doors open) to get an accurate headcount and prevent chaos at check-in.
Crafting Your Run of Show: The Minute-by-Minute Plan
If your pre-event timeline is the map, the run of show is your turn-by-turn GPS on event day. This document tells everyone—from the AV tech to the volunteers—exactly what’s happening, when, and who’s in charge.
Think of it as your event-day bible. A solid run of show keeps the chaos from taking over. It empowers your team to run the show smoothly, even if you get pulled away to deal with a speaker spilling coffee on their laptop.
The Essential Columns of a Run of Show
You don't need to overcomplicate this. The best run-of-show documents are simple spreadsheets. They just need a few key columns to be effective.
Here’s a great hand-drawn example of what this looks like.
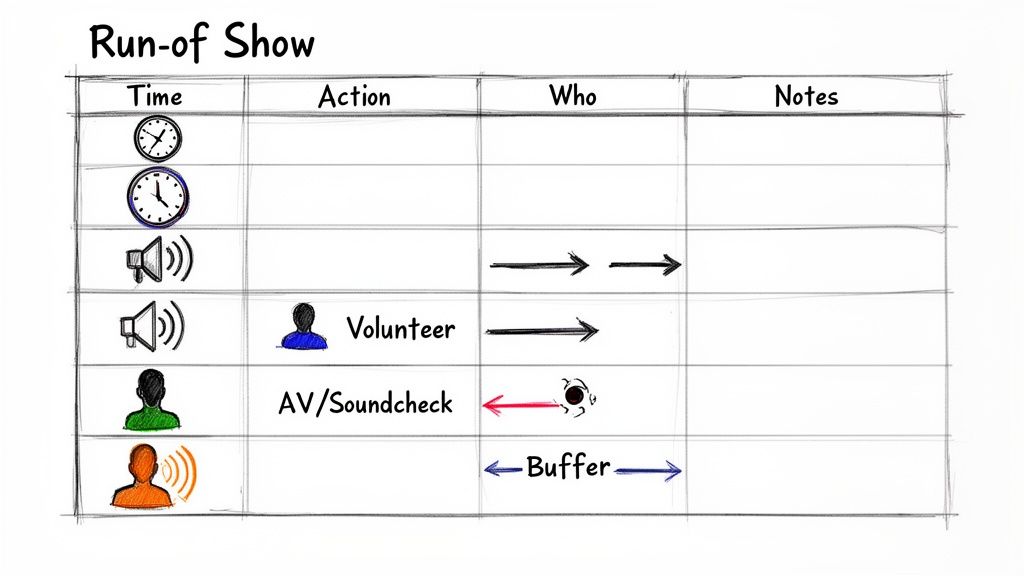
The structure is simple: time, the action, who owns it, and any notes. That clarity is powerful when things get hectic.
Here are the core components:
- Time: The specific time for each activity (e.g., 6:00 PM - 6:15 PM).
- Action: A clear description of the task. Use action words like "Doors Open," "Speaker A Intro," or "Begin Sound Check."
- Who: The name of the person responsible. Not a team, a person. Accountability is everything.
- Notes: Your catch-all for critical details. Think audio cues, lighting changes, or a specific sponsor thank-you.
Honestly, the tool you use matters less than the thought you put into the flow. You have to map out transitions and build in buffer time. For a deeper dive, check out our guide on nailing your event's execution and operations.
Thinking Through the Flow
One of the most common mistakes is scheduling things back-to-back with no breathing room. That's a recipe for disaster. Always add five to ten-minute buffers between major segments. It gives you a cushion if a speaker runs long.
Let’s look at two different scenarios.
A Two-Hour Workshop:
Your run of show will be tight and precise. It should map out check-in, a quick intro, the main teaching block, a short break, a Q&A session, and a clear wrap-up. Every minute counts.
A Five-Hour Pop-Up Dinner:
This timeline is more about phases. You'll schedule staff arrival, final food prep, guest arrival, dinner service (broken down by course), and cleanup. The flow is just as important, but the pacing is completely different.
A great run of show anticipates needs before they happen. It’s the difference between a frantic event and one that feels effortless to your attendees.
This detailed planning is what allows massive events to run smoothly. When a festival sells tens of thousands of tickets in minutes, you can bet their on-the-ground execution is flawless.
A solid run of show is your secret to meeting expectations. It's a tool that gives your entire team the confidence to work as one.
Timeline Templates for Real-World Events
Theory is one thing, but a starting point is better. Let's get practical with some timeline examples for the kinds of events you’re actually running. Forget corporate galas. These are templates for creators.
We’re talking about a weekend workshop, a pop-up dinner, and a community market. Each breaks down into a pre-event checklist and a day-of run of show. Think of these as your defense against a blank spreadsheet.
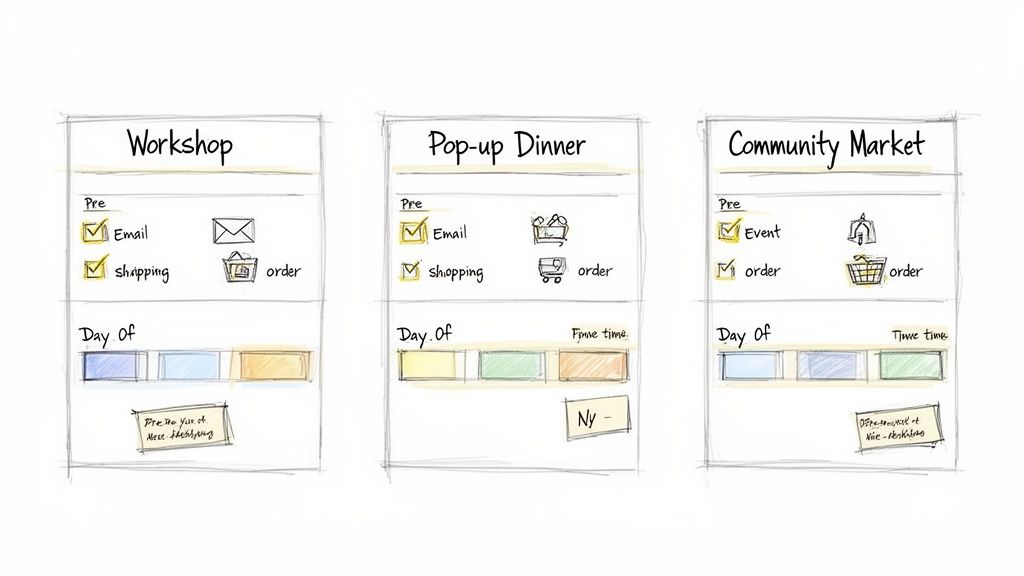
The real goal here? To give you a massive head start.
The Weekend Creative Workshop
Workshops live and die by their flow and preparation. The timeline needs to ensure attendees are ready to dive in and the day runs without a hitch.
Pre-Event Checklist (Key Milestones):
- Eight Weeks Out: Nail down your curriculum. This decides your venue needs, supply list, and ticket price. Get that ticketing page live as soon as this is set.
- Four Weeks Out: Order all physical materials, like workbooks. Print lead times can be surprisingly long.
- One Week Out: Test all your tech. Projectors, microphones, payment processors—check it all, then check it again.
- 24 Hours Out: Send the final "know before you go" email with parking info and start times. This one email cuts down on day-of chaos.
Day-Of Run of Show (Saturday Sample):
- 8:30 AM: Doors open & check-in starts. Coffee is mandatory.
- 9:00 AM: Welcome and introductions. Set the energy for the day.
- 9:15 AM: Session One kicks off.
- 11:00 AM: A crucial 15-minute break. A hard stop is key to staying on track.
- 11:15 AM: Session Two begins.
- 12:30 PM: Lunch.
- 1:30 PM: Session Three (usually the hands-on part).
- 3:00 PM: Q&A and wrap-up.
The Single-Night Pop-Up Dinner
If you’re a pop-up chef, your timeline is a culinary ballet. It's all about ingredient sourcing, precise prep schedules, and service timing. Every minute is choreographed.
The most critical part of a pop-up timeline isn't the dinner service. It's the 72-hour window beforehand where final produce orders are locked in and prep begins.
Pre-Event Checklist (Key Milestones):
- Six Weeks Out: Lock in your menu and venue. This lets you launch ticket sales immediately. Pop-ups run on hype, so selling seats early is everything.
- One Week Out: Confirm all rentals—tables, linens, glassware.
- 72 Hours Out: Place final orders for fresh produce and proteins. This is the sweet spot for freshness.
- 48 Hours Out: Begin prepping sauces, stocks, and marinades.
- 24 Hours Out: Finalize the service plan and brief your staff. Everyone needs to know their role.
Day-Of Run of Show (Sample):
- 2:00 PM: Chef and prep team arrive to set up the kitchen.
- 5:00 PM: Front-of-house staff arrive for their briefing.
- 6:30 PM: Doors open, welcome drinks are served.
- 7:00 PM: First course goes out.
- 7:45 PM: Second course.
- 8:30 PM: Main course is served.
- 9:15 PM: Dessert.
- 10:00 PM: Final service wraps up.
- 11:00 PM: Breakdown and cleanup begins.
While these examples are specific, the core ideas can be adapted for almost any event. To get another perspective, looking at an effective event planning timeline template can give you a solid roadmap. It never hurts to see how someone else does it.
What to Do When the Event Is Over
Think your work is done when the last guest leaves? Not even close.
The cleanup and high-fives are just the end of Act One. A professional wrap-up happens after the event. It’s how you turn a good night into a loyal community for your next one.
This part of your timeline is easy to overlook, but it’s where one-time attendees become regulars.
The First Forty-Eight Hours
The two days after your event are for high-impact, time-sensitive tasks. Yes, you're tired, but the buzz is still fresh. You need to use it.
Your first move? Send thank-you emails. Don't put it off. Send one to attendees, volunteers, and any sponsors. A genuine, timely thank-you is worth its weight in gold.
This is also your prime financial window. Square away expenses and reconcile your budget while everything is fresh in your mind. If you're using a modern ticketing platform, payouts should hit your account quickly and securely. With flat-fee pricing, you know exactly what you’ve earned without hidden percentage fees surprising you.
The One-Week Follow-Up
Once the dust has settled, it’s time for the long game. The week after your event is perfect for gathering feedback and sharing highlights.
Send out a simple feedback survey. What did people love? What could be better? This is mission-critical intel for your next event. Keep it short, just three to five questions.
This is also the moment to flood social media with photos and videos. Tag attendees, thank sponsors again, and recapture the day's energy. This creates a lasting digital footprint and gives anyone who missed out a serious case of FOMO. It’s a fantastic opportunity to tease your next event.
A great post-event process is your bridge to the next success. It’s the final piece of building a loyal following that shows up again and again.
This cycle of hosting, wrapping up, and planning again is the engine of the events world. Wrapping up an event can feel like a whole separate project, but having a structured plan makes all the difference.
Burning Questions About Event Timelines
You've got the big picture, but a few questions always pop up. Let's tackle the most common ones I hear from people putting on their first event. Here are some quick, no-fluff answers.
How far in advance should I start planning my event?
It all comes down to scale.
If you're planning a small workshop for 15 to 30 people, six to eight weeks is usually the sweet spot. That's enough runway to promote it properly.
But for a bigger pop-up or a small community festival aiming for over a hundred attendees? You’ll want to start three to four months out. That extra time is crucial for locking in a venue, lining up vendors, and building marketing momentum.
The golden rule? Start with your event date and work backward. Be honest about how long each major task will actually take.
What's the most common mistake with event timelines?
Not building in buffer time. It's the number one rookie error.
Things go wrong. They just do. Your keynote speaker will hit traffic. The check-in line will move slower than you thought. It happens to everyone.
If your run-of-show is scheduled down to the second, one small hiccup can throw the entire day into chaos. Always add five to ten-minute buffers between your major segments. It’s your secret weapon against stress.
This wiggle room is your safety net. It gives you space to handle the unexpected without your attendees ever knowing something went sideways. It’s the simple trick that makes you look like you’ve been doing this for years.
When should I open and close ticket sales?
Get your ticket sales live the second you have your date, venue, and a solid event description. For most events, this is about six to twelve weeks out. A great tactic is to launch with an early-bird discount to kickstart sales and create some buzz.
When should you close them? My hard rule is to cut off sales 24 hours before the event starts. This is critical. It saves you from the chaos of last-minute sales while you're focused on setup. More importantly, it gives you a final, accurate headcount for catering, seating, and supplies.
Ready to stop wrestling with spreadsheets and clunky software? Ticketsmith was built for creators like you. Get your event page live in minutes with your own branding, sell tickets with a simple flat fee, and get paid fast. Whether it's for five people or five thousand, we handle the tech so you can focus on creating an unforgettable experience.
Join the waitlist for Ticketsmith today and get ready for ticketing that just works.
Join the waitlist
Be the first to know when Ticketsmith launches. Get exclusive access and early-bird pricing.
Written by
Will Townsend
Founder, Ticketsmith
Writes practical guides on event ticketing, pricing, and promotion for independent organizers.