How to Host a Pop Up Event
Will Townsend
·
Hosting a pop-up event comes down to three things: a clear goal, a realistic budget, and a plan to get people in the door. It’s about turning your killer idea (artisan cronuts?, a macrame workshop?) into a real-world experience.
Nail these three basics, and everything else gets easier.
Your Idea Is Great. Now Let’s Make It Real.
Before you scout a venue or mock up a flyer, get clear on why you're doing this. Seriously. Don't skip this part.
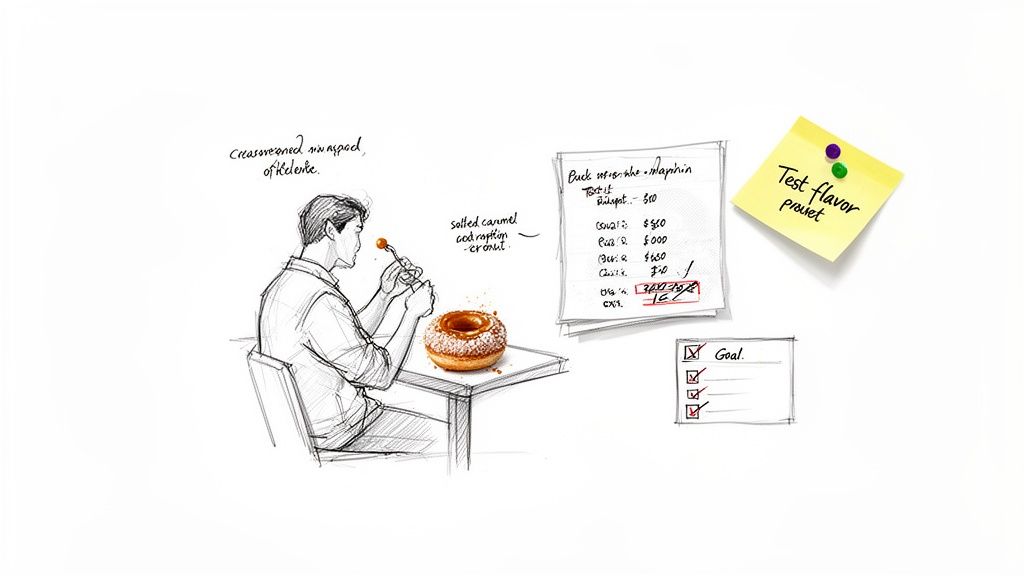
What does a win look like? Selling out of your new product? Getting 50 fresh email addresses? Maybe it's just getting honest feedback on a new tasting menu from 20 guests.
Pick one simple, measurable goal. Write it down. This isn't a corporate mission statement. It’s your compass. A clear goal stops you from getting sidetracked by a million shiny objects later.
A local ceramicist I know wanted to test her new $75 mugs. Her pop-up goal was simple: sell 30 mugs in one day. Every decision, from the cozy venue to her targeted social ads, focused on that number. She sold 42.
Sketch Out a Back-of-the-Napkin Budget
Okay, let's talk money. You don't need a complex spreadsheet yet. Grab a notebook and jot down every potential cost you can think of. This is the fastest way to see if your idea is viable before you're too deep in.
Break it down into three buckets:
The Space: This is usually your biggest cost. Do a quick search for one-day rental costs for a small gallery, photo studio, or community space in your city. Ballpark it for now.
The Stuff: What do you need to buy or rent? Think supplies, inventory, decorations, or a point-of-sale system. If you're selling goods, don't forget packaging. This buyer's guide to eco-friendly packaging is a great resource for materials.
The People: How will you get people to show up? Set aside a small chunk for social media ads, flyers, or collaborating with a local influencer.
Add it all up. That number is your estimated total cost. It's the first step to figuring out how much to charge.
This simple timeline shows how your goal shapes your budget and, ultimately, your pricing.
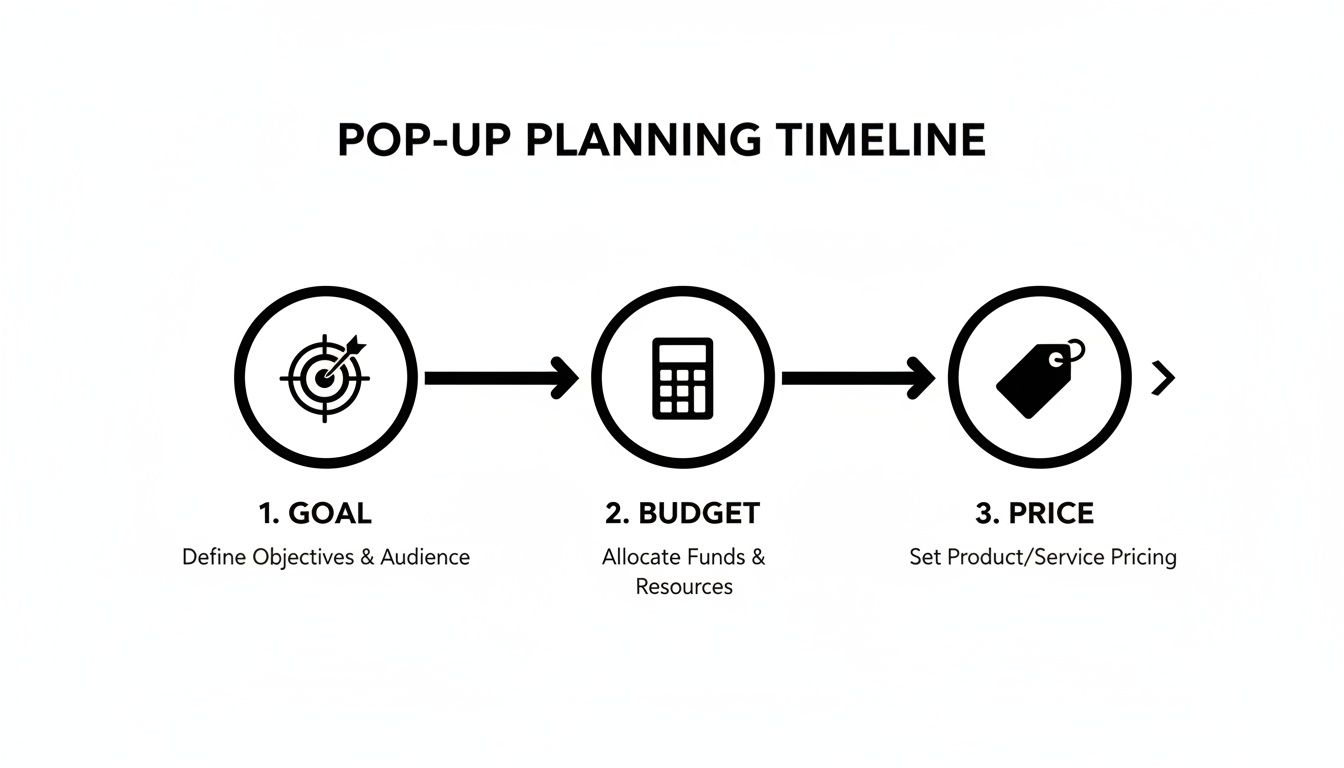
Defining your goal first makes budgeting and pricing a logical next step, not a wild guess.
Setting a Price That Actually Pays You
You've got estimated costs. Now you can set a ticket price that makes sense. Please don't pull a number out of thin air.
Start with your total cost. Divide it by the number of people you can realistically expect. That’s your break-even price per person. If your costs are $1,000 and you’re aiming for 50 attendees, your break-even ticket price is $20.
But you're not in this to break even. Add a margin on top. That's your profit. It pays you for your time, work, and creativity. There are a ton of ticketed event ideas that can inspire different pricing models, from workshops to exclusive dinners.
When you're ready to sell tickets, use a tool that's dead simple. You want something you can set up in minutes, no code needed. Look for a platform that lets you use your own branding, so your ticket page feels like your event. And watch out for services that skim a percentage off every sale. A flat fee means you keep more of your money, and fast payouts are a must. This is a business, not a hobby.
Finding a Space and Untangling the Red Tape
Alright, let’s tackle what scares most people off: finding a place and wading through permits. It’s not as bad as it looks. The trick is knowing what to look for and who to ask.
The right space does more than just hold people. It sets the tone for your event. You don’t need a giant, expensive hall. Some of the best pop-ups happen in unexpected places.
Think creatively. Is there a local brewery that’s closed on Mondays? A photo studio with an open weekend? An art gallery between exhibits? These places often want to use their downtime and might cut you a deal.
Scouting the Right Location
First, picture your ideal attendee. Where do they already hang out? If you can set up where they already are, you’ve won half the battle.
Here are a few places to start your search:
Empty Storefronts: Drive through neighborhoods you like and look for "For Lease" signs. You'd be surprised how many landlords are open to a short-term rental to make some money on a vacant property.
Collaborate with Existing Businesses: This is huge. Team up with a local boutique, coffee shop, or gym whose customers are your people. You bring them new faces; they get a cut or just enjoy the buzz. It's a true win-win.
Unique Event Spaces: Search for small galleries, community halls, or shared workshop spaces. These spots are often designed for short-term rentals and usually come with the basics.
Once you have a shortlist, start asking questions. Don’t be shy. Getting clarity now saves headaches later.
Before you sign anything, get it in writing. A simple one-page agreement with the date, time, cost, and what's included is all you need. It protects you and the venue owner.
Questions to Ask the Venue
Schedule a walkthrough and come with a list of questions. This isn't just about the price. It’s about understanding the space’s limits and possibilities.
Here’s your must-ask list:
What’s the total cost? Get the full picture: rental fee, security deposit, and potential cleaning fees. Are there hidden charges for using their tables or sound system?
What are the insurance requirements? Most venues require event liability insurance. It’s usually not expensive, but it's almost always mandatory.
What are the rules on decorations? Can you hang things on the walls? Are candles a no-go? Knowing the restrictions ahead of time helps you plan.
Is there Wi-Fi and adequate power? You need reliable internet for your payment processor and enough outlets for everything else.
What’s the parking and accessibility situation? Think about how guests will arrive. Is there street parking? Public transit? Is the entrance accessible for everyone?
Nailing down these details early is a huge part of a successful pop-up. If you’re in the food world, our deep dive on how to start a pop up restaurant goes even further into venue logistics.
Demystifying Permits and Licenses
Okay, the red tape. It's boring, I know, but it’s critical. Getting shut down because you forgot a $50 permit is a nightmare you want to avoid.
The specific permits you need depend on your city and what you're doing. Start at your city's official government website. Look for a "special events" or "business licensing" department.
Here are some of the usual suspects:
Temporary Event Permit: Often the main permit for any public gathering.
Food Handler's Permit: If you’re serving food or drinks, you and your staff will almost certainly need this.
Health Department Permit: For food pop-ups, the health department has its own rules and may need to inspect your setup.
Alcohol License: Serving booze? This needs a specific license. Plan ahead.
Seller’s Permit: If you’re selling products, you’ll need this to collect sales tax.
Music/Entertainment License: Playing music might require a license from organizations like ASCAP or BMI.
I nearly got an event shut down over a noise complaint because I forgot a sound permit. It was a stressful lesson. Don’t be me. Call your city hall, explain what you're planning, and ask them what you need. They're usually happy to help.
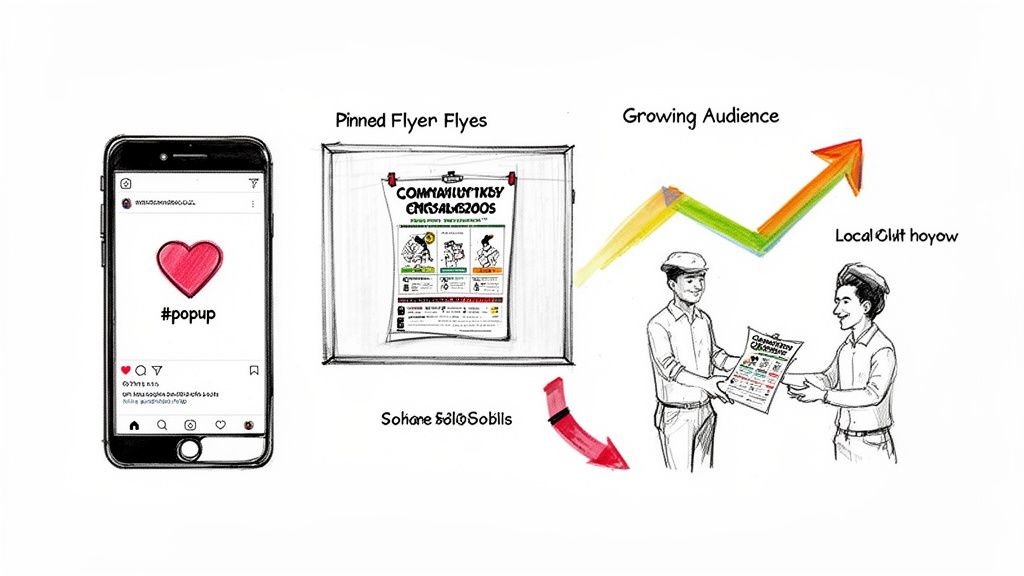
Marketing Your Pop-Up So People Actually Show Up
You can plan the perfect event, but it means nothing if the room is empty. This is where the real work begins. Don’t worry, you don’t need a massive marketing budget. For small creators, scrappy, smart tactics work wonders.
The goal isn't just to blast a digital flyer everywhere. It's about creating content people want to share and making it easy for them to buy a ticket.
Start With What You Have
Your most powerful marketing tool isn't a fancy ad campaign. It's your existing network. Before spending a dime, start with the people who already know and love what you do.
Create a simple, shareable graphic or a quick video. Send it to your friends, family, and past customers. Don't just ask them to come. Ask them to share it with one person they think would love it. A personal recommendation is worth more than a dozen ads.
This is also the time to put your social media to work. But don't just post once and call it a day. Build a story.
Show the behind-the-scenes: A chef testing recipes? Share a video of a near-disaster in the kitchen. People connect with the messy process.
Introduce your partners: If you're collaborating with a venue or another creator, feature them. Tag them and tell your audience why you're excited to work with them.
Run a small contest: Offer a free ticket to someone who tags a friend in the comments. It’s a classic for a reason.
If you have a small promotional budget, you could explore professional social media marketing services to dial in your targeting.
Make Buying a Ticket Effortless
This is critical. All the marketing hype won’t matter if your checkout process is a mess. When someone decides they want to come, you need to capture that impulse immediately.
Your ticketing page should feel like an extension of your brand, not some clunky portal. Look for a platform that lets you add your own logo and colors. You can get a page set up in minutes without touching a line of code.
Think about it: every extra click is another chance for someone to get distracted. Your goal should be a two-click checkout. Find event, click buy, enter payment. Done.
Also, keep an eye on the fees. Hidden percentage skims can eat into your profits. A simple, flat fee per ticket is more predictable and lets you keep more of the money you earn. Fast, secure payouts to your bank account are also non-negotiable.
Partner Up With Local Allies
You don't have to build an audience from scratch. Tap into existing communities. Find local businesses or creators who serve the same type of person you do.
A pop-up chef could team up with a local wine shop. A fitness instructor could host a workshop at an athleisure boutique. The boutique gets foot traffic, you get access to their customers, and everyone gets a unique experience.
When you reach out, keep your pitch simple:
Start with a genuine compliment about their business.
Explain your event in one or two sentences.
Clearly state what’s in it for them (cross-promotion, a percentage of sales, new customers).
A thoughtful message to five perfect partners is better than a lazy email to fifty. We've got more tips on this in our guide on how to publicize an event.
Don't Underestimate Local Press
Getting a mention in a local blog or newsletter can be huge. You don't need a publicist. You just need a good story.
Write a simple press release. Forget the jargon. Just answer: Who, What, When, Where, and Why. What makes your event interesting? Are you donating a portion of proceeds to charity? Find your angle.
Next, build a small list of local journalists and bloggers who cover events in your area. Send them a personal email with the press release attached. Keep it short. The worst they can do is say no.
Remember, pop-ups are goldmines for launching new things. In fact, 46% of retailers use them to introduce new products. This strategy is helping the sector grow toward $80 billion globally. For you, a pop-up isn't just about sales. It's a tool for building loyalty. You can find more details in these recent pop-up marketing stats.
Setting Up Ticketing Without the Headache
Let's talk about the most important part: getting paid. How you handle money can make or break the experience. Fumbling with a cash box creates friction nobody needs. A dedicated ticketing platform is your best friend.
Seriously, don't overcomplicate this. The right tool lets you get an event page live in minutes. No code, no designers. The goal is to make buying a ticket an impulse, not a project. If someone has to click more than a few times, you might lose them.
Your Brand, Not Theirs
When someone lands on your ticket page, it should look like your event. Custom branding is huge. You want your logo, your colors, your voice—not the giant logo of some third-party platform. It builds trust and makes the experience feel cohesive.
You wouldn't let a random company design your physical space. Don't let them control your digital front door. A professional-looking page signals a professional-quality event.
Understand the Money Part
Pricing for ticketing platforms can be a minefield. Many big-name services skim a percentage off every ticket, plus a fixed fee. The more you charge, the more they take. It feels like getting punished for your success.
Look for a platform with simple, flat fee pricing. You pay a predictable, small amount per ticket. That's it. No sketchy percentage skims. This transparency lets you budget accurately. You know exactly how much cash will land in your bank.
The best systems are built for real people pouring heart into their events. They get that every dollar counts for a pop-up chef or workshop host. Your ticketing partner should feel like a partner, not a tax collector.
Fast, secure payouts are also non-negotiable. You need that cash flow to cover costs, not wait weeks for a check. Good platforms send money straight to your account. You can find more practical advice in our guide on how to sell event tickets for your pop-up.
From Five to Five Thousand Guests
Your ticketing system needs to work for an intimate dinner for 10 or a market with hundreds. The right tool scales with you. It should handle a rush of sales without crashing and provide the same smooth experience for your fifth guest as it does for your five-thousandth.
This reliability lets you focus on the event, not on whether your tech is about to implode.
This approach mirrors what works in digital marketing. Onsite popup conversions average 4.82%, but can jump to 57.7% for top performers. When it comes to pop-up event ticketing, mobile-friendly strategies convert 36% better than desktop. A simple, optimized page on any device is key. You can find out more about how these stats can inform your strategy.
Running the Show on Event Day
All the planning comes down to this. The doors are about to open. Take a breath. A smooth event isn't about everything going perfectly. It’s about being so prepared you can handle it when something goes wrong.
Do as much as you can before the first guest arrives. This frees you up to solve problems, talk to guests, and actually enjoy the thing you worked so hard to create.
The Morning-Of Game Plan
Before you unlock the door, run through a final sweep. Think of this as your pre-flight check. Getting these small details sorted now prevents massive headaches later.
Your goal is to walk into your event feeling calm, not behind schedule.
Here’s a quick rundown:
Test Your Tech: Seriously, test it again. Run a real transaction on your payment reader. Check the Wi-Fi. Make sure your phone and other devices are at 100% charge.
Final Venue Scan: Walk the entire space. Is it clean? Is the bathroom stocked? Is the lighting right? Fix it now.
Brief Your Team: If you have help, gather everyone for a quick five-minute huddle. Make sure everyone knows their role and the schedule.
Set the Mood: Get your playlist going. Light candles or turn on diffusers. Put out the welcome sign. Create the atmosphere before anyone arrives.
A well-run event feels effortless to attendees. They don't see the frantic morning prep. They just feel the good energy. That feeling is your goal.
Here's a simple checklist you can use to make sure nothing slips through the cracks.
Pop-Up Event Day-Of Checklist
| Task Category | Checklist Item | Status |
|---|---|---|
| Setup & Venue | Final walkthrough for cleanliness and safety | ☐ |
| Check bathroom supplies (toilet paper, soap) | ☐ | |
| Set up signage (welcome, directions, pricing) | ☐ | |
| Adjust lighting and temperature for comfort | ☐ | |
| Start background music or playlist | ☐ | |
| Technology | Test POS system/payment reader with a live transaction | ☐ |
| Verify Wi-Fi connection is stable | ☐ | |
| Ensure all devices (phone, laptop) are fully charged | ☐ | |
| Check ticket scanner or check-in app | ☐ | |
| Staff & Vendors | Conduct a brief team huddle to review roles | ☐ |
| Confirm vendor arrival and setup times | ☐ | |
| Have emergency contact list for all staff/vendors handy | ☐ | |
| Operations | Set out cash box with adequate change | ☐ |
| Review contingency plans (e.g., for bad weather) | ☐ | |
| Post event schedule where staff can see it | ☐ |
Having a checklist like this is a lifesaver. It quiets the "did I forget something?" voice in your head.
Making a Great First Impression
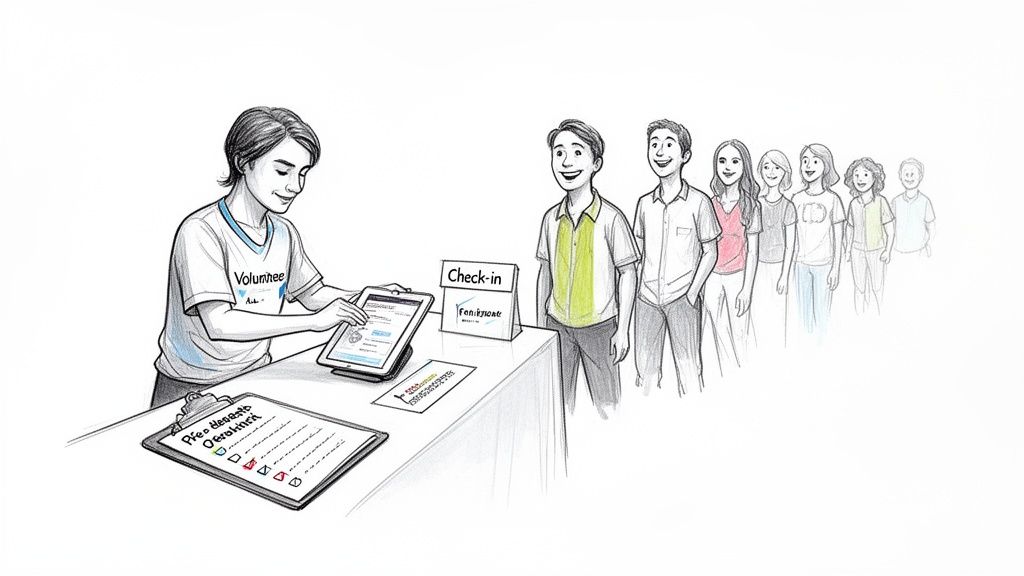
The check-in process is your first real interaction with guests. It needs to be fast and friendly. A long, confusing line at the door is a terrible start.
If you sold tickets online, this should be easy. Using a system like Ticketsmith lets you quickly scan a QR code from a guest's phone. No fumbling with printed lists. It’s efficient for you and smooth for them.
This setup works whether you have five guests or five hundred. The attendee gets a quick scan and a warm welcome, and you get a real-time count of who has arrived.
Handling the Inevitable Hiccups
Something will go wrong. It always does. The ice delivery will be late. A speaker will get stuck in traffic. Accept this now. Your job isn't to prevent every problem. It's to respond calmly when they happen.
The secret is to have already thought through the most likely issues. What's your Plan B for rain? Do you have the phone number for a backup vendor? A simple contingency plan for two or three probable disasters turns a crisis into a minor inconvenience.
When a problem hits, take a breath. Focus on the solution, not the problem. Your calm demeanor will keep everyone else from panicking. Guests will remember how well you handled it far more than they’ll remember the problem itself.
After the Dust Settles: What to Do Next
The event is over. The last box is packed. You're probably exhausted. But your job isn’t quite done. The hours and days after your pop-up are golden. This is your chance to turn that one-time buzz into a lasting community.
Don't let the momentum fade. The connections you just made are fresh. A little follow-up goes a long way.
Send a Thank You That’s Actually Human
Before you do anything else, send a thank-you email to your attendees. Don't make it sound like a corporate robot. Keep it short, personal, and genuine.
Thank them for coming. Share a photo from the day to remind them of the great time they had. This is also the perfect moment to ask for feedback. A simple one-question survey—like "What was your favorite part?"—can give you priceless insights.
Most importantly, tell them what’s next. Are you launching an online store? Planning another event? Give them something to look forward to. This simple email turns attendees into followers.
Face the Numbers, Honestly
Alright, time to look at the money. It can be tempting to just enjoy the glow of a great event, but you need to do a quick financial wrap-up. It doesn’t need to be a forensic audit. Just an honest review.
Start with the basics:
Total Revenue: Add up all your ticket and product sales.
Total Expenses: Tally every cost—venue, supplies, marketing, fees. Everything.
Net Profit: Subtract total expenses from total revenue.
Did you hit your goal? What were the unexpected costs? Maybe you spent more on ice than you budgeted or less on ads. This data isn't about judging yourself. It’s about learning. Knowing these numbers is how your next pop-up becomes twice as profitable.
A friend who runs a pop-up bakery was shocked to find 20% of her budget went to last-minute supply runs. For her next event, she overbought ingredients and ended up saving money and a ton of stress. You can't fix what you don't measure.
Keep the Fire Going
Your pop-up gave you a captive audience. Now your job is to nurture those new connections. You've collected emails and gained social media followers. It's time to put them to use.
Keep sharing content related to your event for the next week. Post a photo gallery, share a highlight reel, or shout out some of your favorite guests (with their permission). This extends the life of your event and shows people who missed out what to expect next time.
This follow-up is why pop-ups are so powerful. Imagine an event that not only sells out but also skyrockets your brand's visibility. That's the reality for 80% of retailers who consider their pop-ups a success. This means your supper club can achieve similar wins as the industry barrels toward a $15.6 billion valuation, according to recent pop-up shop marketing reports.
The work you do after the doors close builds the foundation for whatever comes next.
Your Top Pop-Up Event Questions, Answered
Alright, let's get into it. Planning your first pop-up can feel like solving a puzzle with a million pieces. Here are the questions we hear all the time.
How Far in Advance Should I Actually Start Planning This Thing?
My honest advice? Give yourself a solid three to four months. I know it sounds like a lifetime, but you'll thank yourself later.
That buffer is your best friend. It gives you time to find the perfect venue instead of settling, navigate the slow process of securing permits, and—most importantly—market your event so people show up.
A rushed event almost always ends in a bad location or an empty room.
Think of it like this:
Month 1: Nail down your concept, run your budget, and lock in the venue.
Months 2-3: This is prime time for promotion and sorting out logistics—vendors, suppliers, staffing.
Final Month: Go all-in on a big marketing push and triple-check every day-of detail.
What’s the Biggest Mistake First-Timers Make?
Underestimating marketing. Hands down.
So many creators perfect their product but forget they have to actively get people in the door. They think, "If I build it, they will come."
They won't. You have to build buzz, create excitement, and make it easy for people to find you and buy a ticket.
The second biggest mistake? Ignoring permits. I get it, it’s the most boring task on your list. But skipping this can get your event shut down and land you a massive fine. It's not worth the risk.
How Do I Figure Out What to Charge for Tickets?
Start with the cold, hard numbers. Add up everything.
Get a spreadsheet and list every potential cost: venue, supplies, marketing, payment processing fees, insurance—all of it. Once you have your total, figure out a realistic number of attendees.
Divide your total cost by your expected number of attendees. That's your break-even price.
But you're not in this just to break even, right? You need to add a profit margin. A good starting point is to see what similar local events charge. But don't be afraid to charge what you're worth. If you’re offering a unique, high-value experience, people will pay for it.
Ready to stop worrying about the tech and start selling tickets? Ticketsmith helps you set up a beautiful, branded ticketing page in minutes. No code, no hidden percentage fees—just a simple flat fee per ticket so you keep more of your money. Get started at ticketsmith.co.
Join the waitlist
Be the first to know when Ticketsmith launches. Get exclusive access and early-bird pricing.
Written by
Will Townsend
Founder, Ticketsmith
Writes practical guides on event ticketing, pricing, and promotion for independent organizers.